How To Set Up Auto Replies for LinkedIn Service Requests
LinkedIn's Service Marketplace has become a valuable platform for freelancers and service providers to find new clients and projects. However, manually responding to every service request can be time-consuming, especially when you receive multiple opportunities daily.
In this guide, we will show you how to set up automatic replies to LinkedIn service requests using the Bindago app. With Bindago's auto-reply feature, you can automatically submit proposals and send personalized messages to service requesters based on customizable conditions, ensuring you never miss an opportunity while maintaining a professional, targeted approach.
The Service Request Challenge
When clients post service requests on LinkedIn, they often receive numerous proposals. To stand out, you need to respond quickly with a compelling proposal. However, manually reviewing each service request, crafting personalized proposals, and submitting them can be overwhelming, especially for busy professionals managing multiple projects.
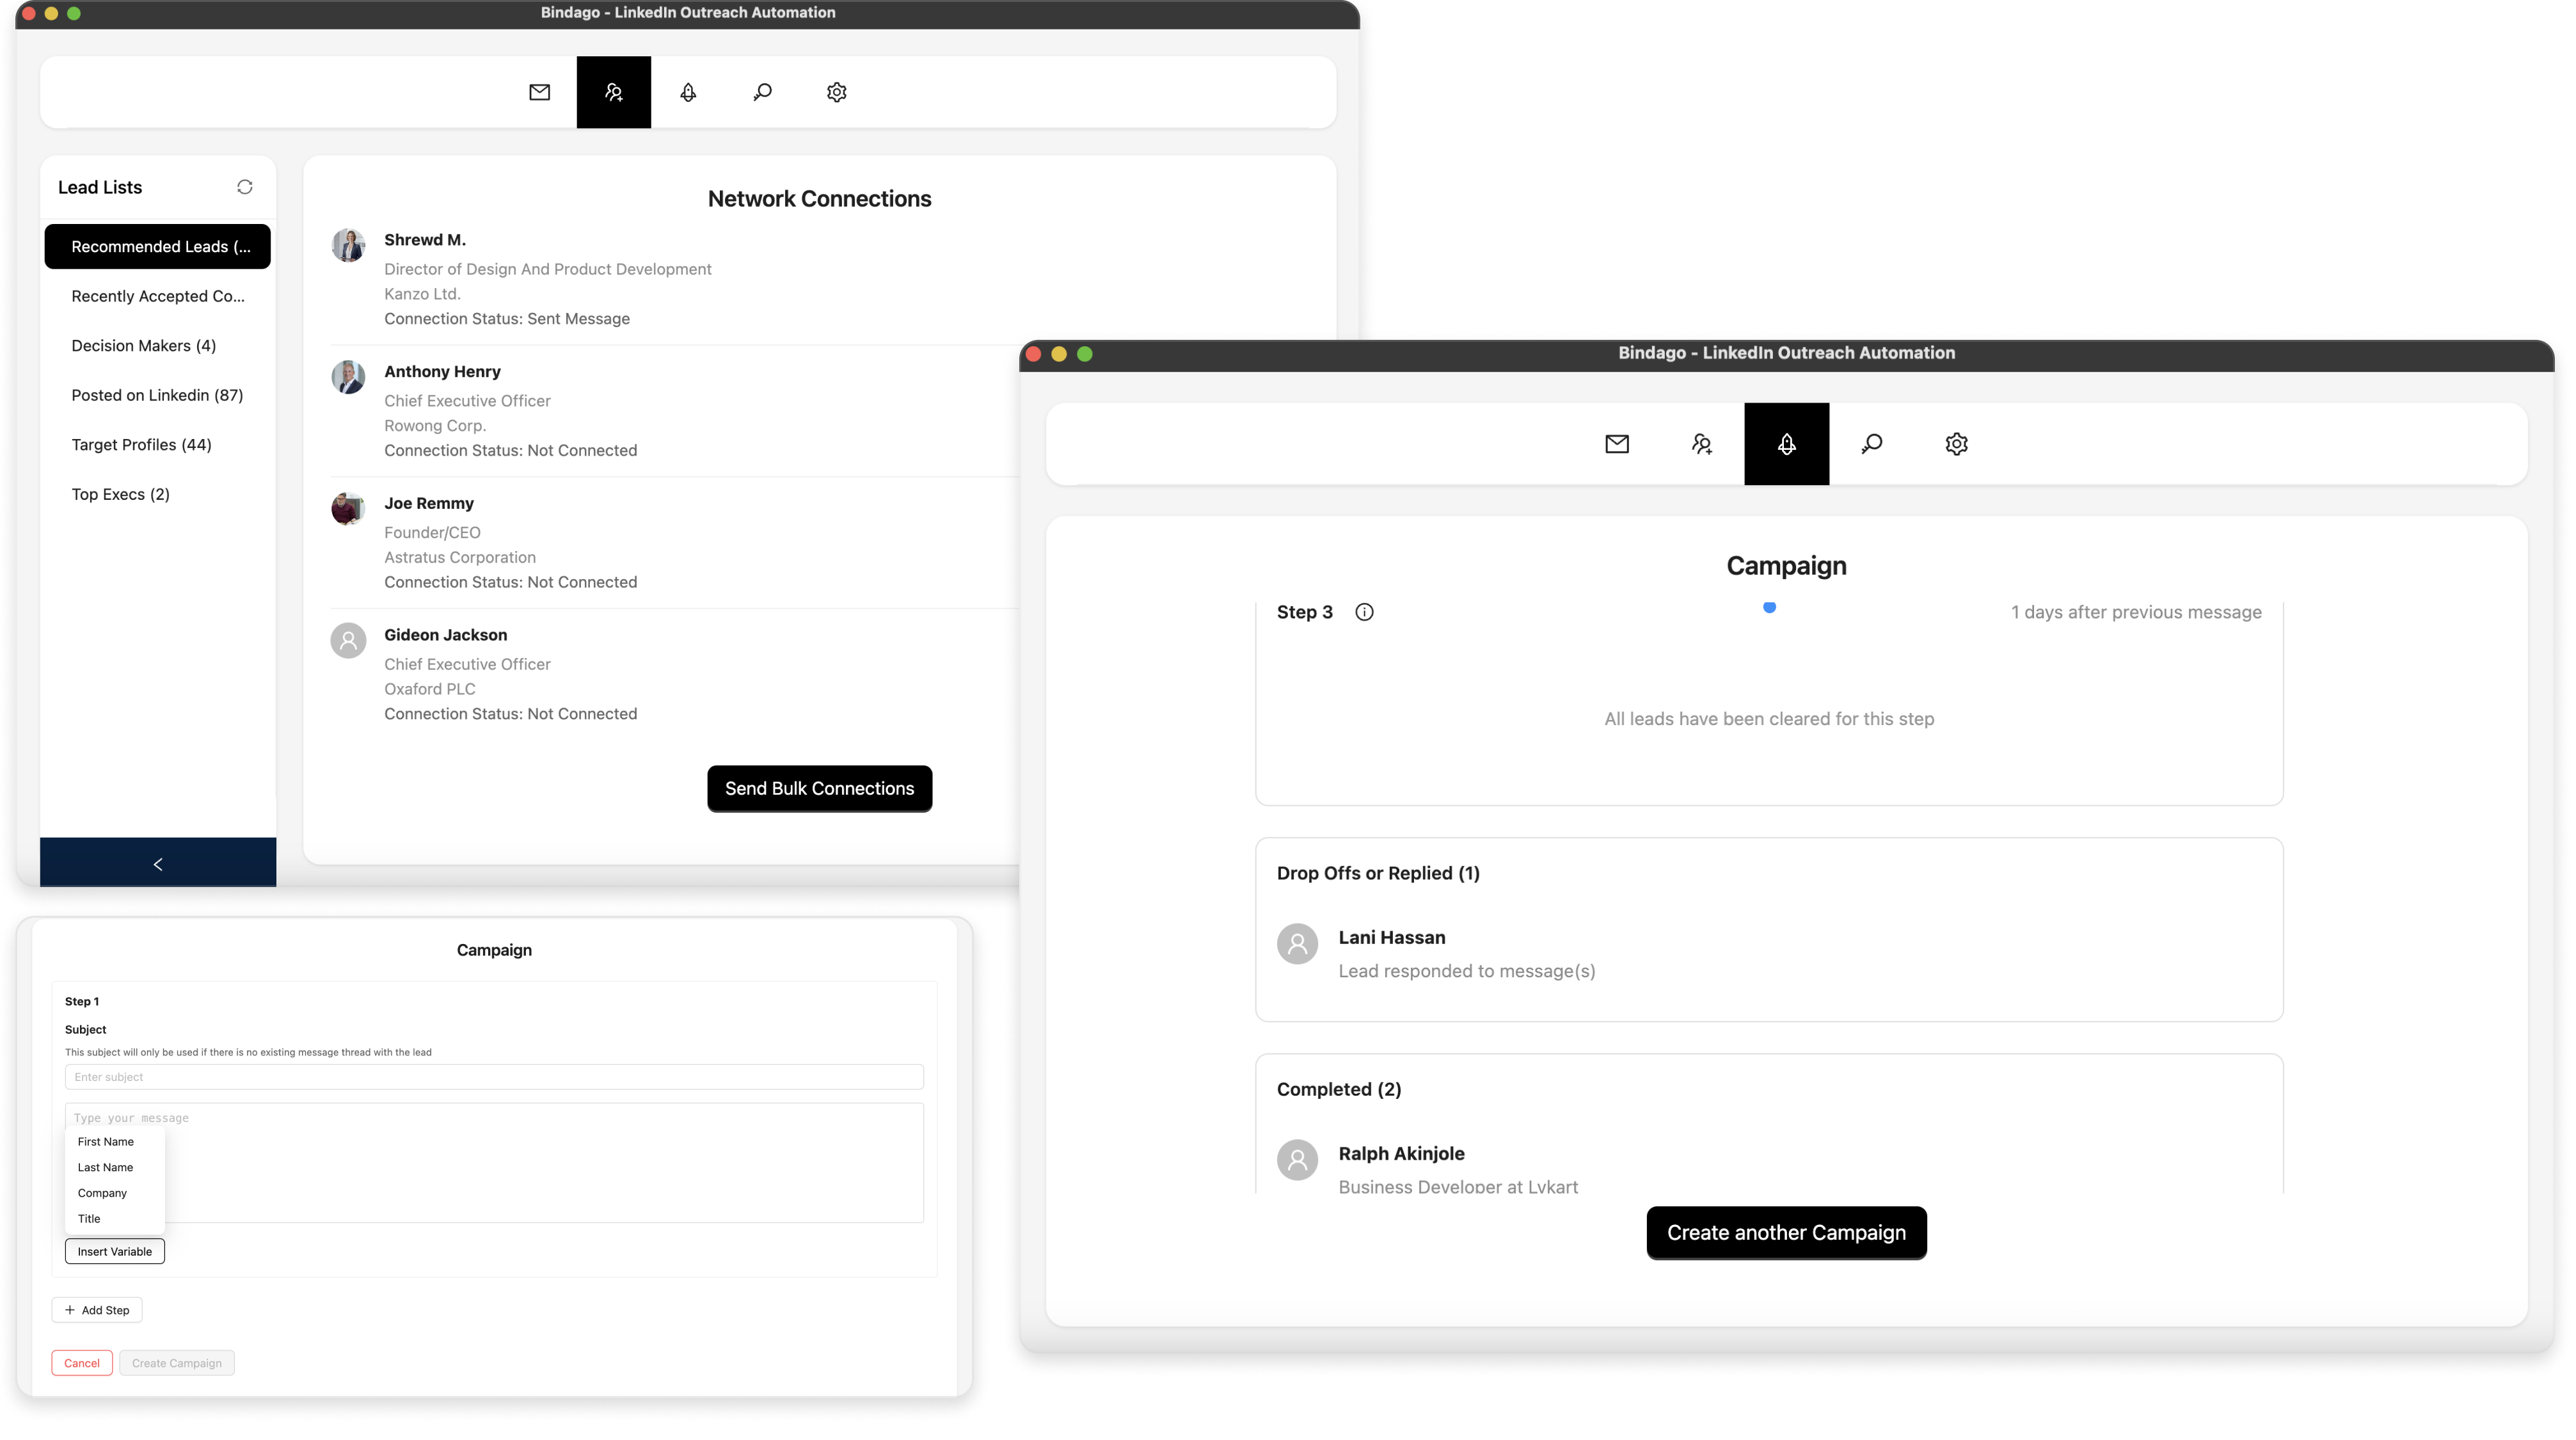
Using Bindago's Auto-Reply Feature
Bindago is a powerful application designed to help you automate your LinkedIn outreach activities. The auto-reply feature for service requests allows you to automatically submit proposals and send messages to service requesters based on specific conditions you define. This ensures you respond to relevant opportunities while filtering out requests that don't match your criteria.
Install the Bindago App
To install the Bindago app, simply visit the website (https://bindago.com), and click the download link that is applicable to your operating system. Once downloaded to your computer, launch the application and complete the installation process.
Log In to Your LinkedIn Account
- Launch the Bindago App
- Click on the button that says "Click to login with Browser". This will open linkedin.com on the Chromium or Edge Browser.
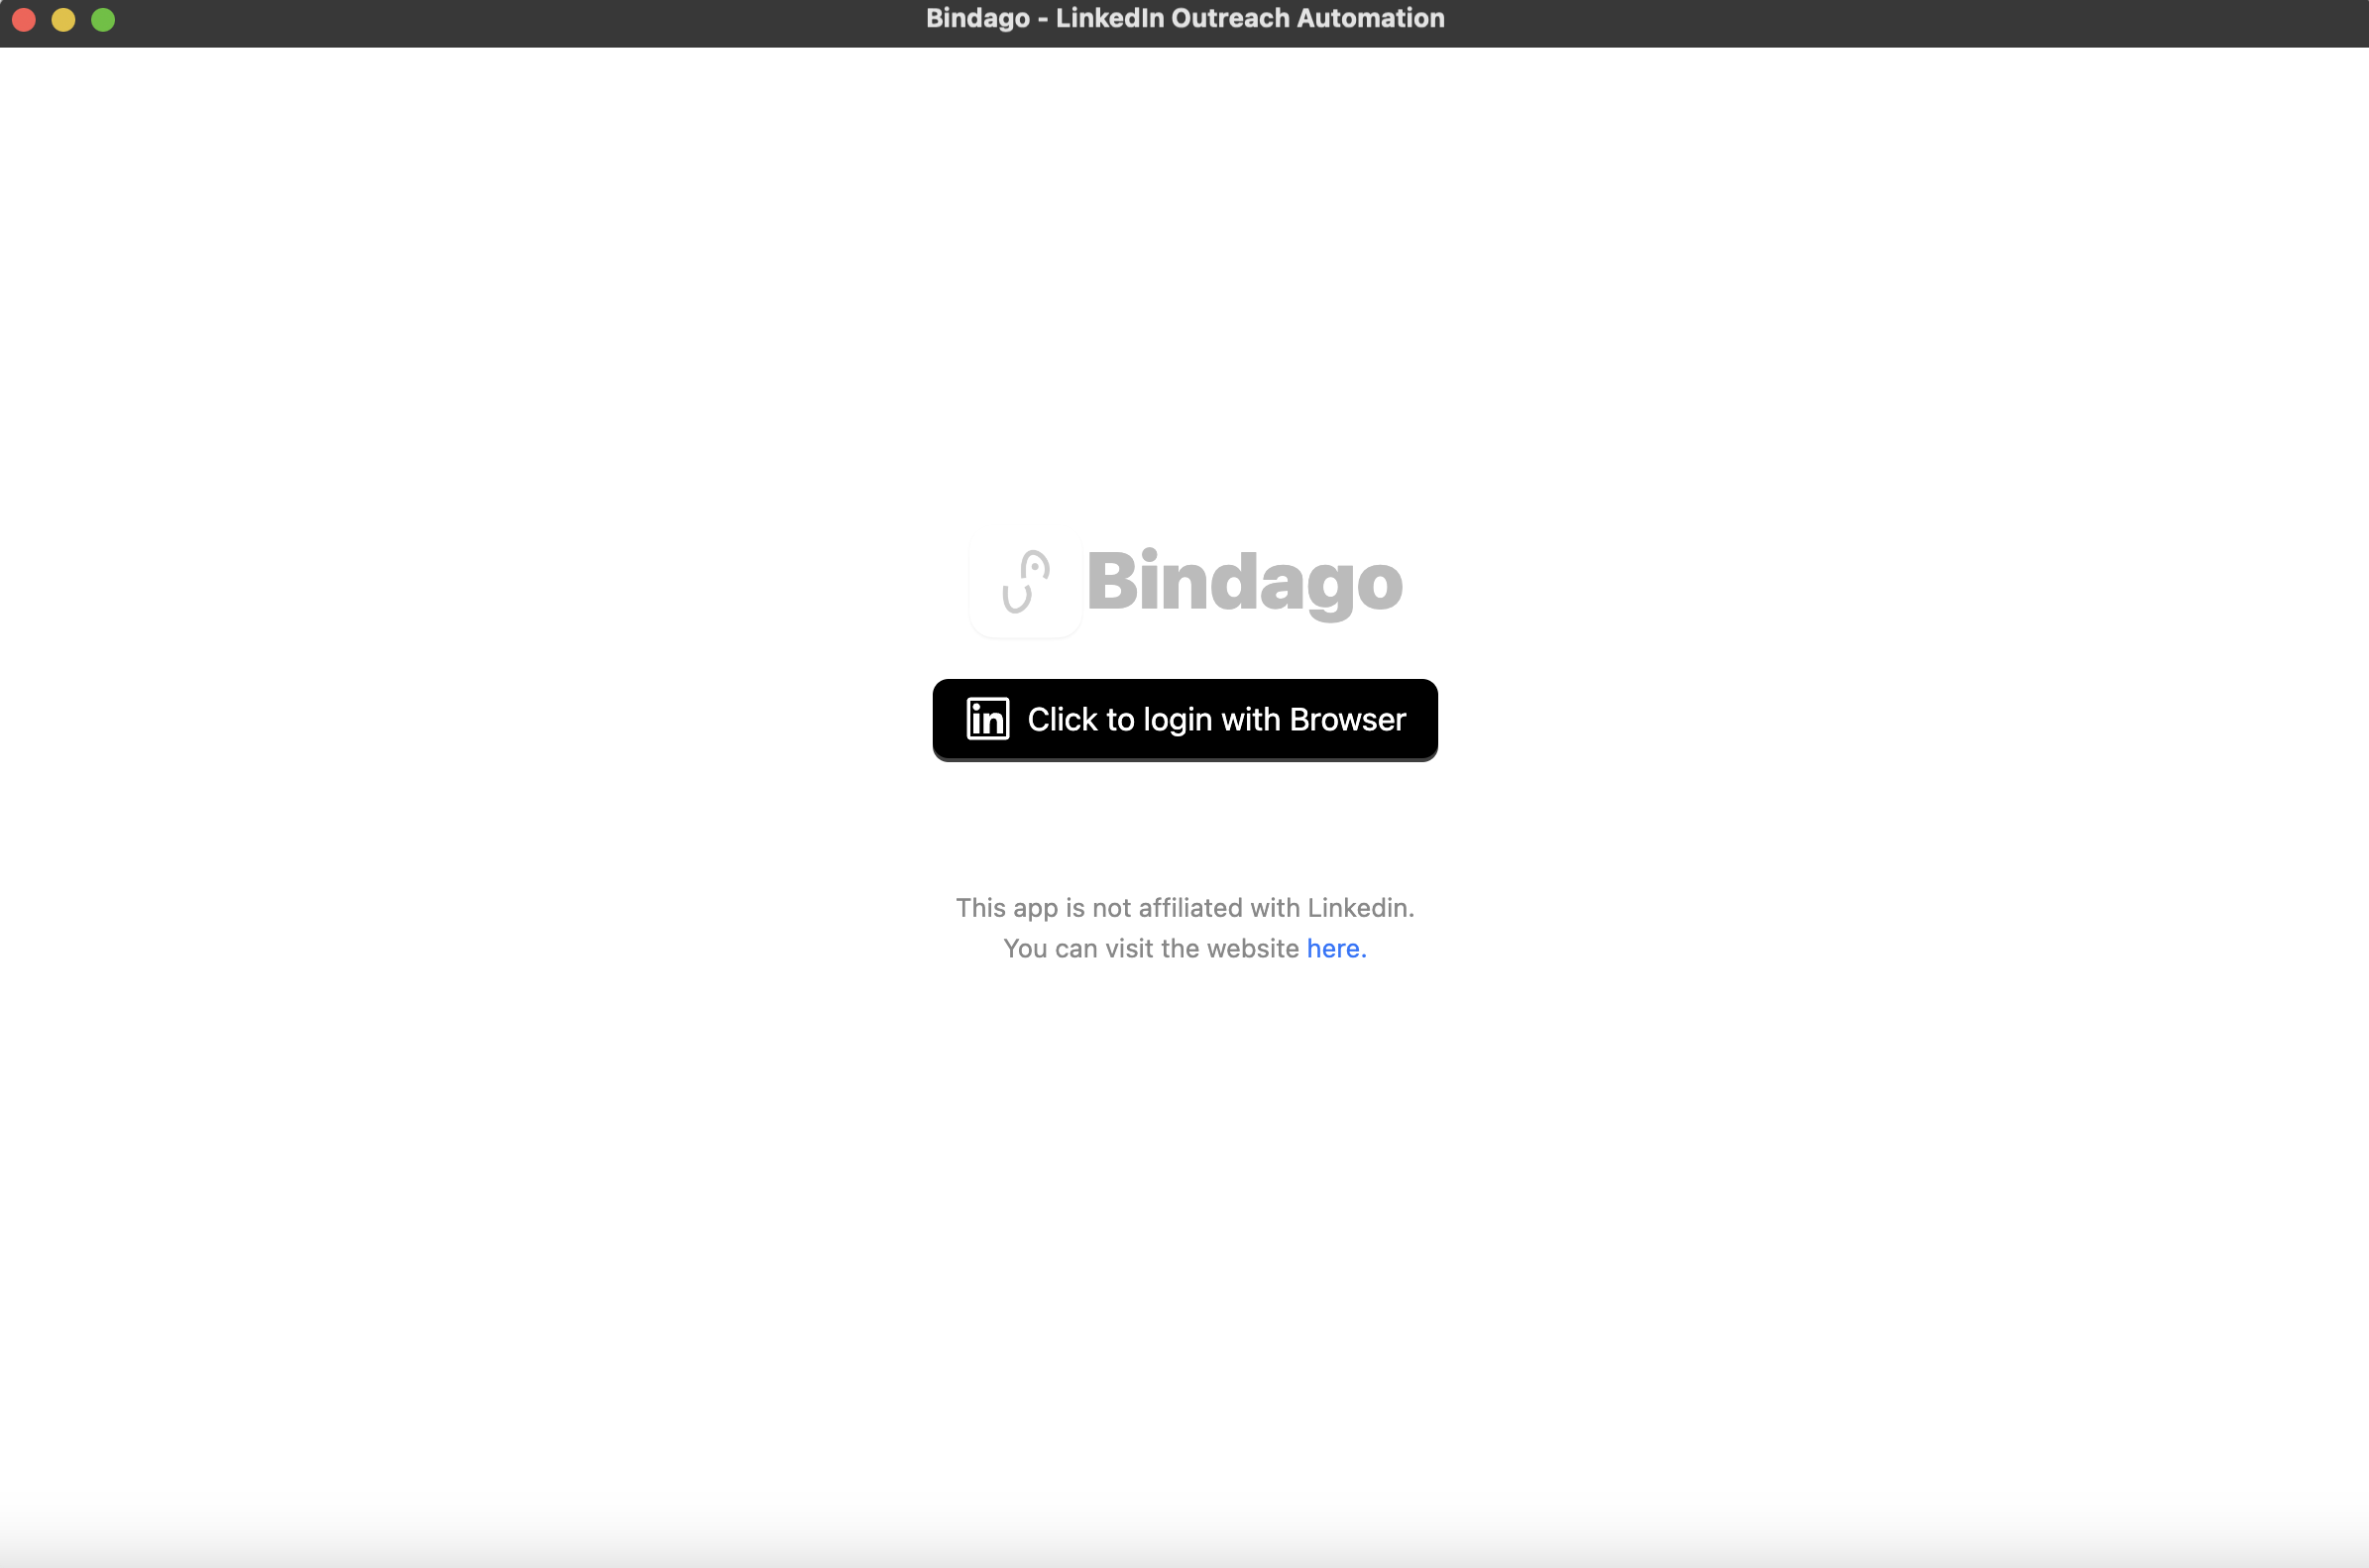
- Log into your desired LinkedIn Account via the LinkedIn page opened on the Browser.
- Once login is complete, the browser will be automatically closed and you can switch back to the Bindago app as it loads up your account.
Navigate to Auto Replies
- After logging in, navigate to the "Auto Replies" menu option at the top of the Bindago app (hover over the menu items to see their names).
- Click on "Auto Replies" to open the auto-reply management interface (see screenshot).
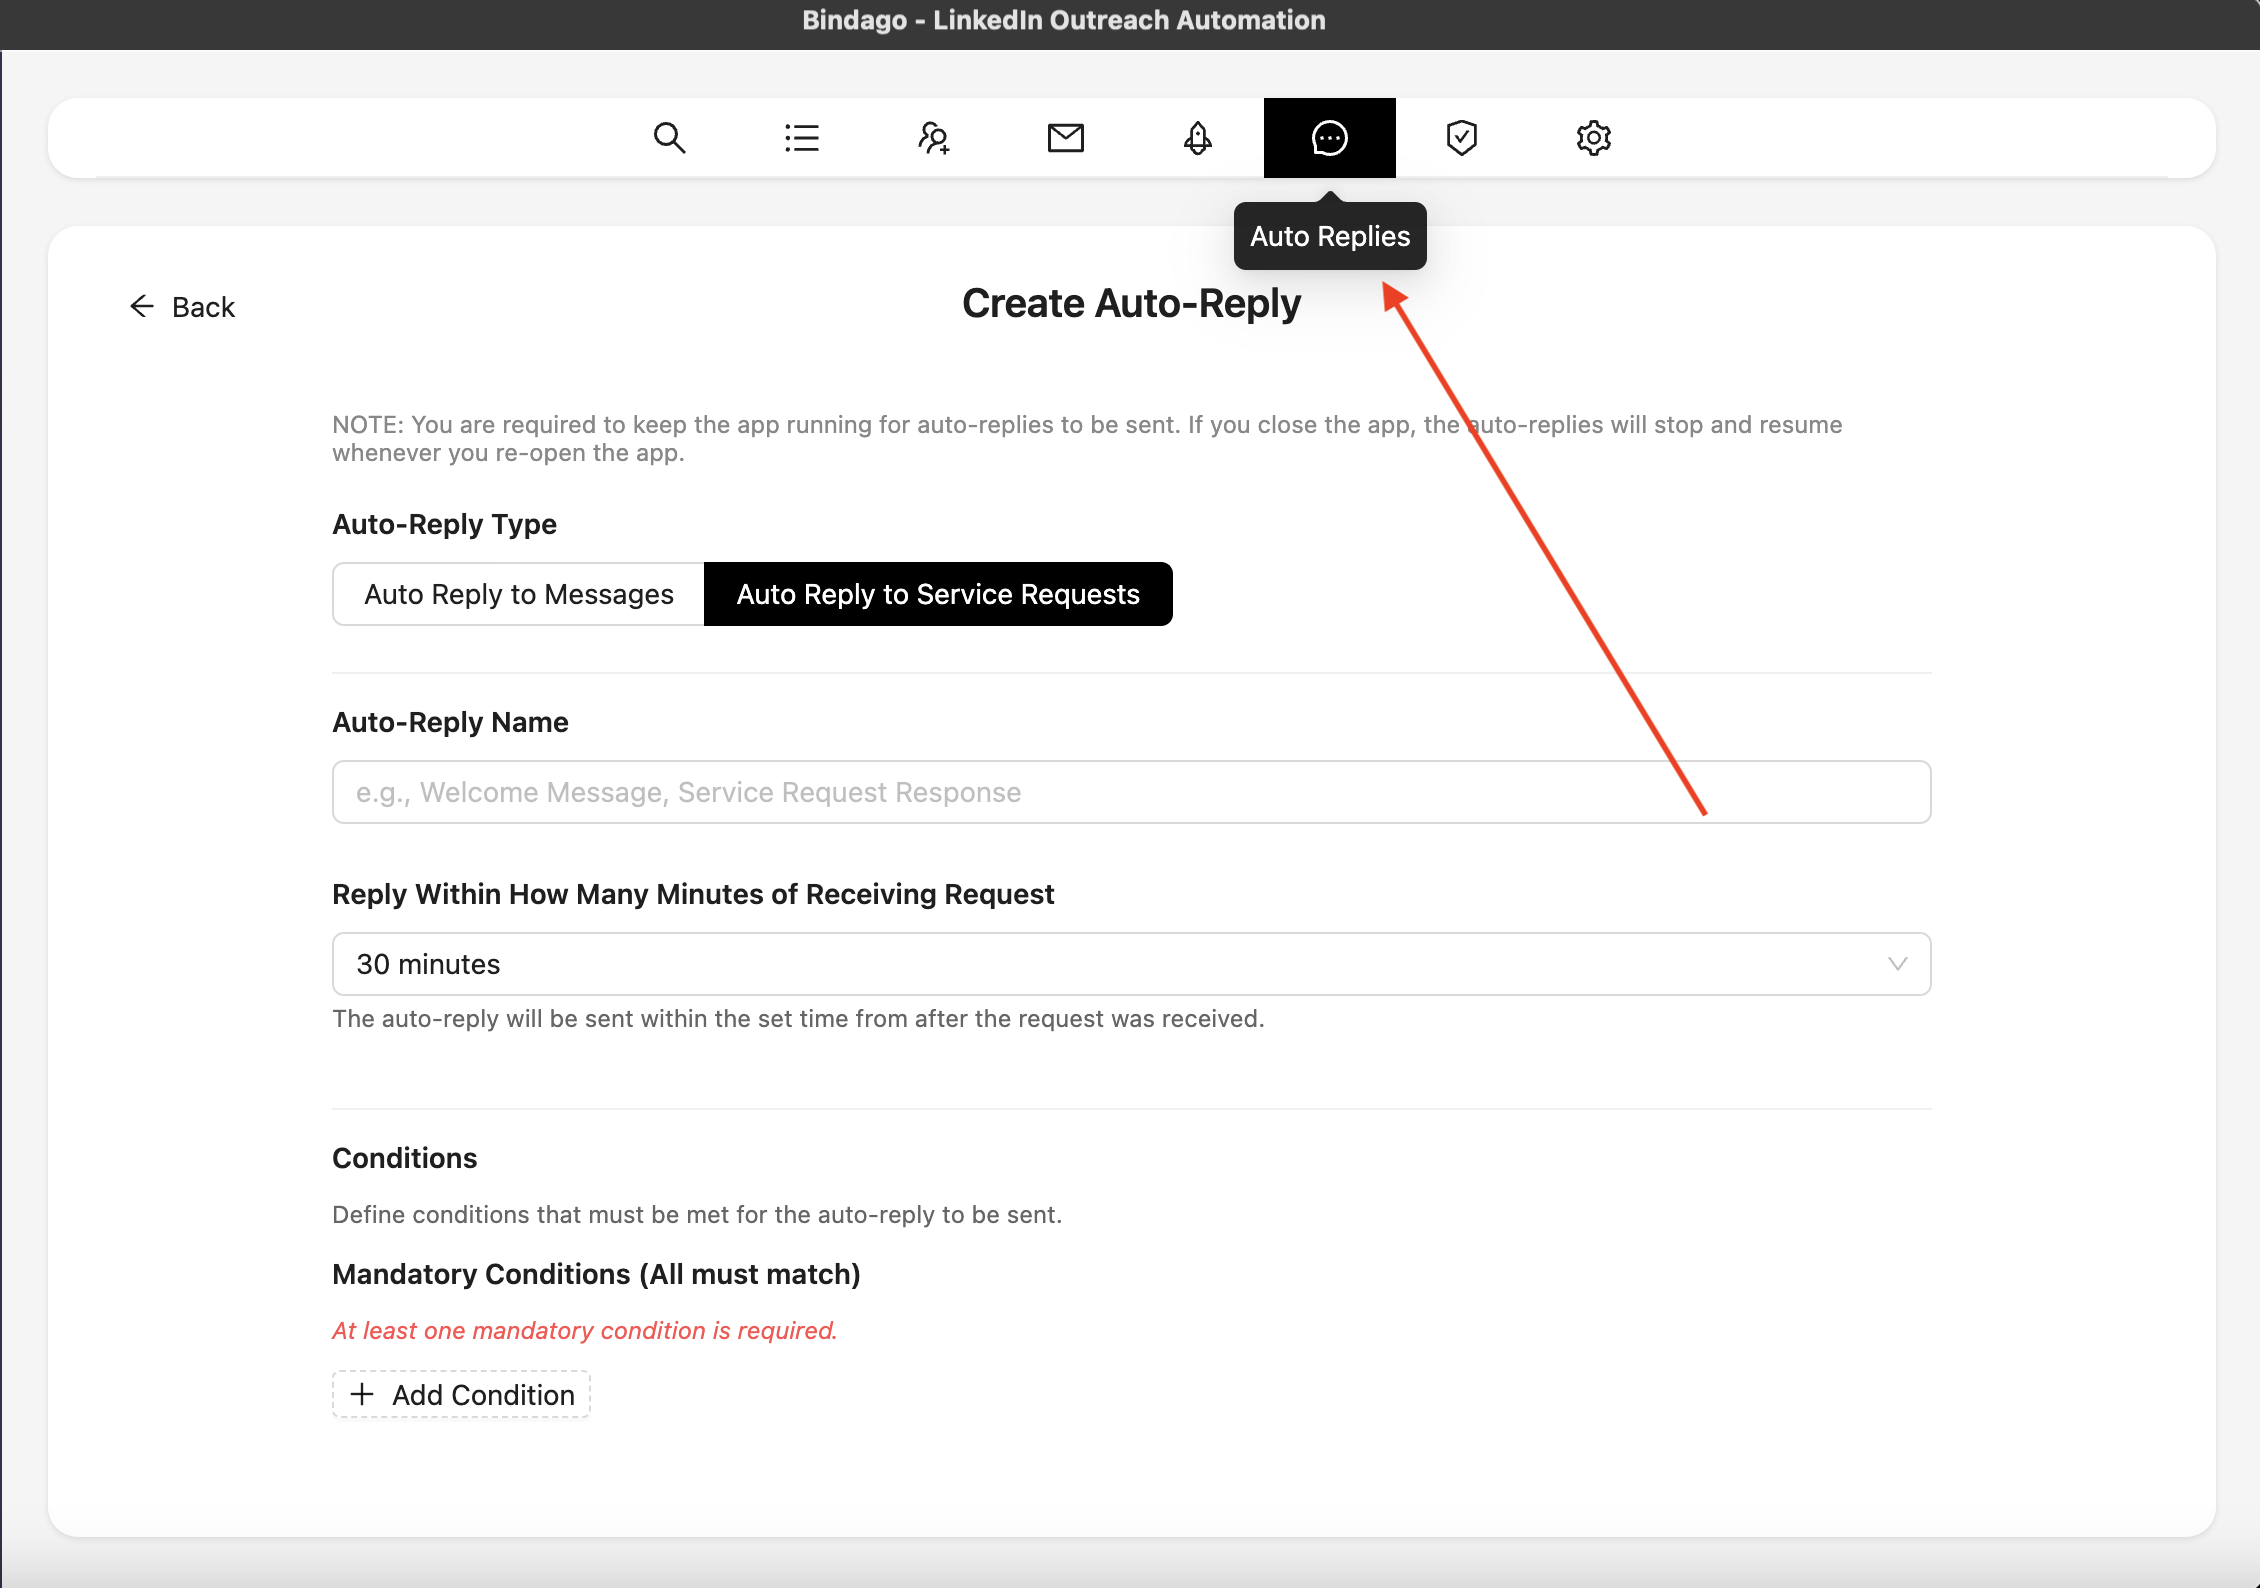
Configure Basic Settings
- Auto-Reply Type: In the Auto Replies interface, you'll see at the top of the form the option to select your auto-reply type between "Auto-Reply Messages" and "Auto-Reply Service Request". For this guide, the option to select here is "Auto-reply Service request".
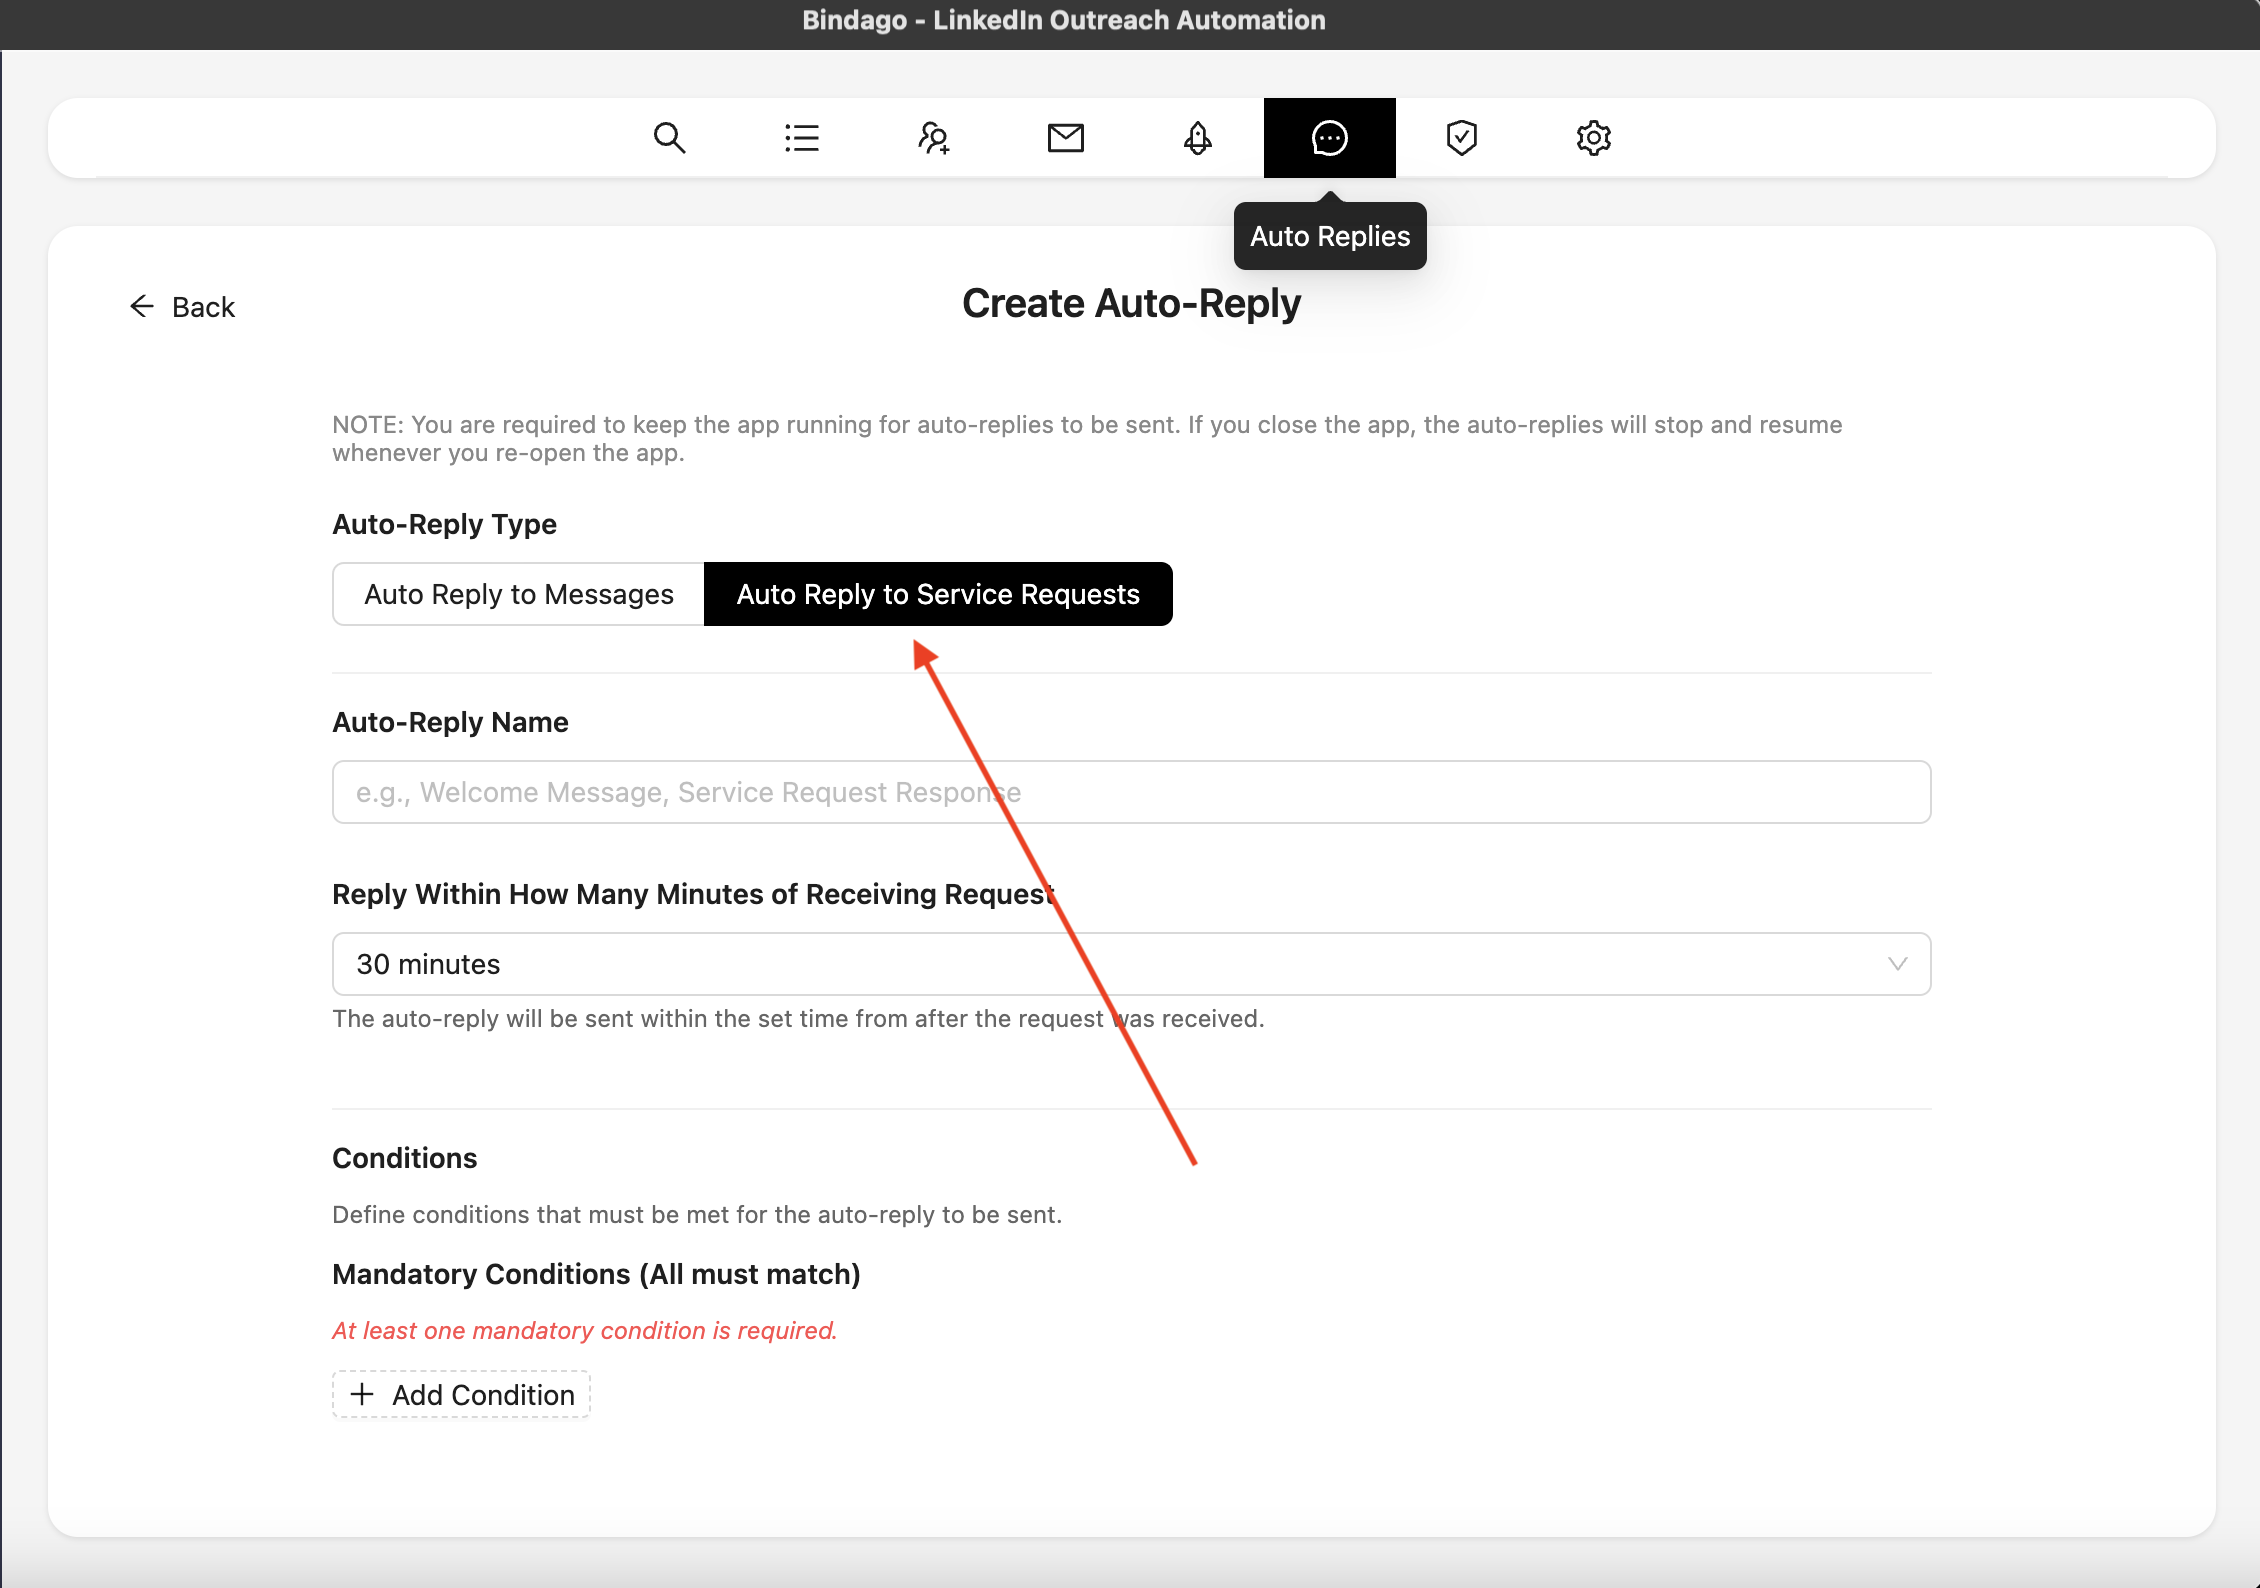
- Name: Enter a descriptive name for your auto-reply configuration (e.g., "Resumé Review Request").
- Reply Timing: Select how many minutes within receiving a service request you want to reply. Options include 30 minutes, 1 hour, 2 hours, or 4 hours.
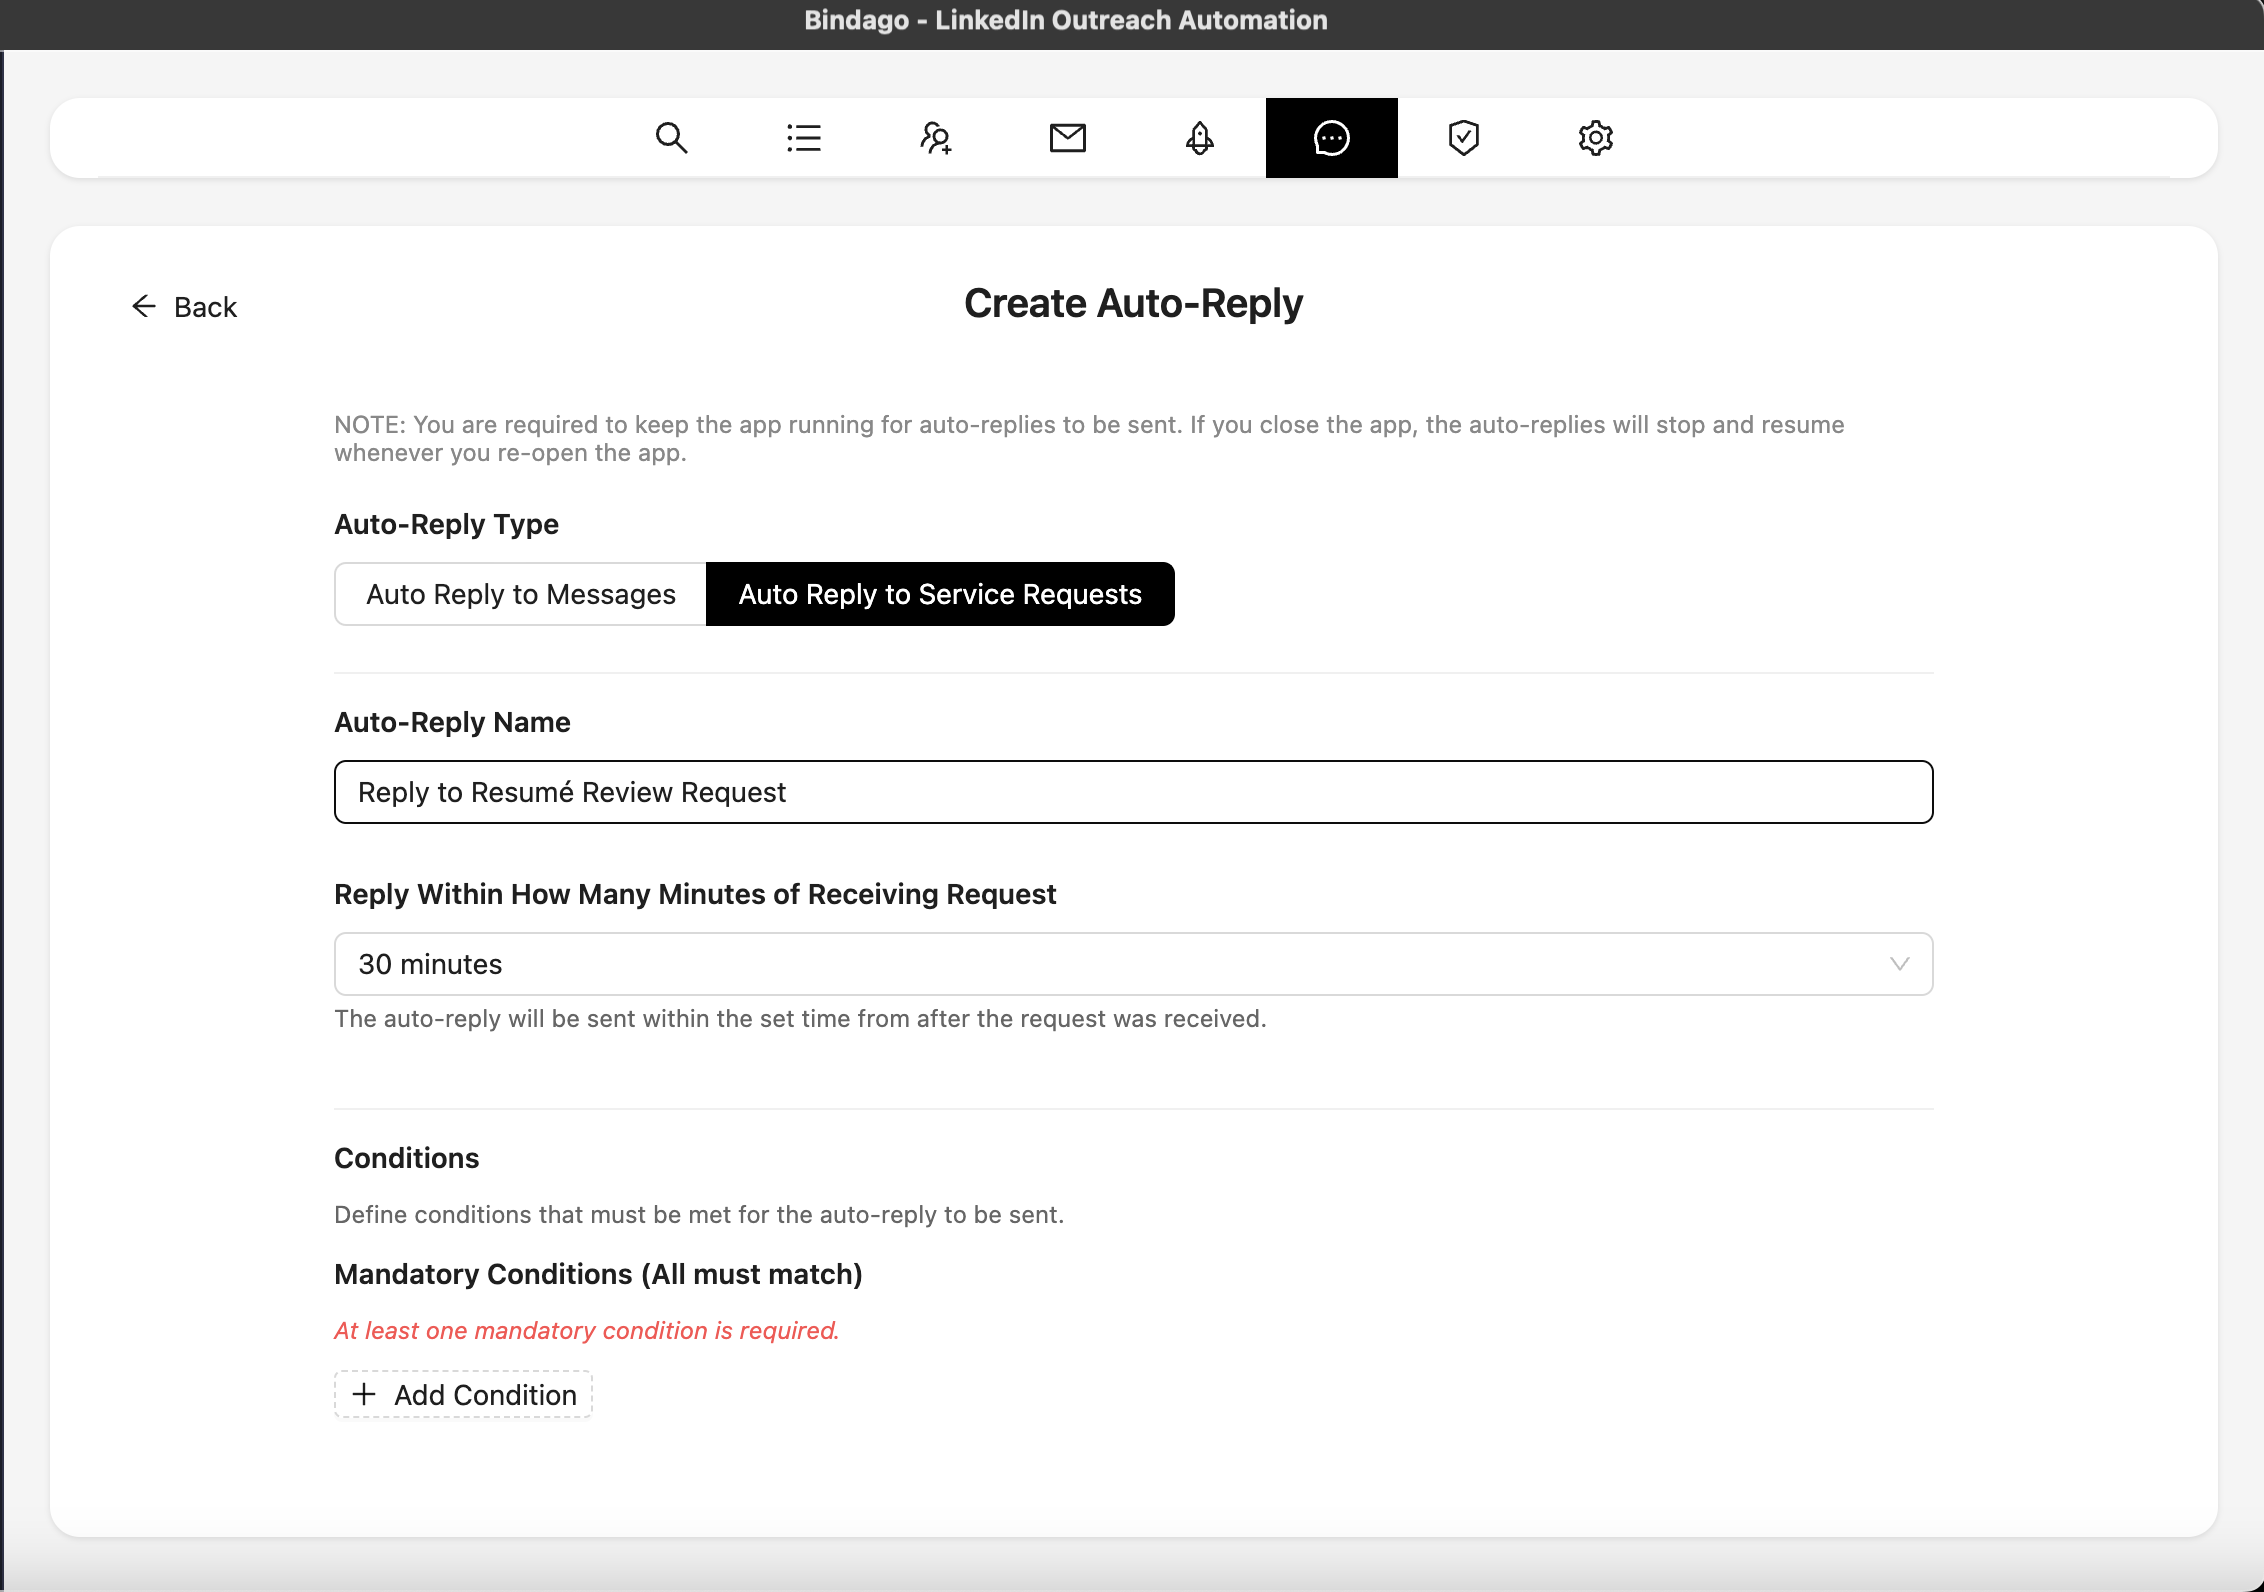
Set Up Conditions
Conditions help you target specific service requests that match your criteria. You can set up mandatory conditions (all must match) and optional conditions (at least X must match).
- Mandatory Conditions: These are conditions that must all be satisfied for the auto-reply to trigger.
- Optional Conditions: These are conditions where at least a specified number must match.
Common condition fields include:
- Service Request Title: Match requests based on keywords in the title
- Is Premium Service Request: Target premium or direct service requests
- Service Request Question Answer: Match based on answers to specific questions in the request
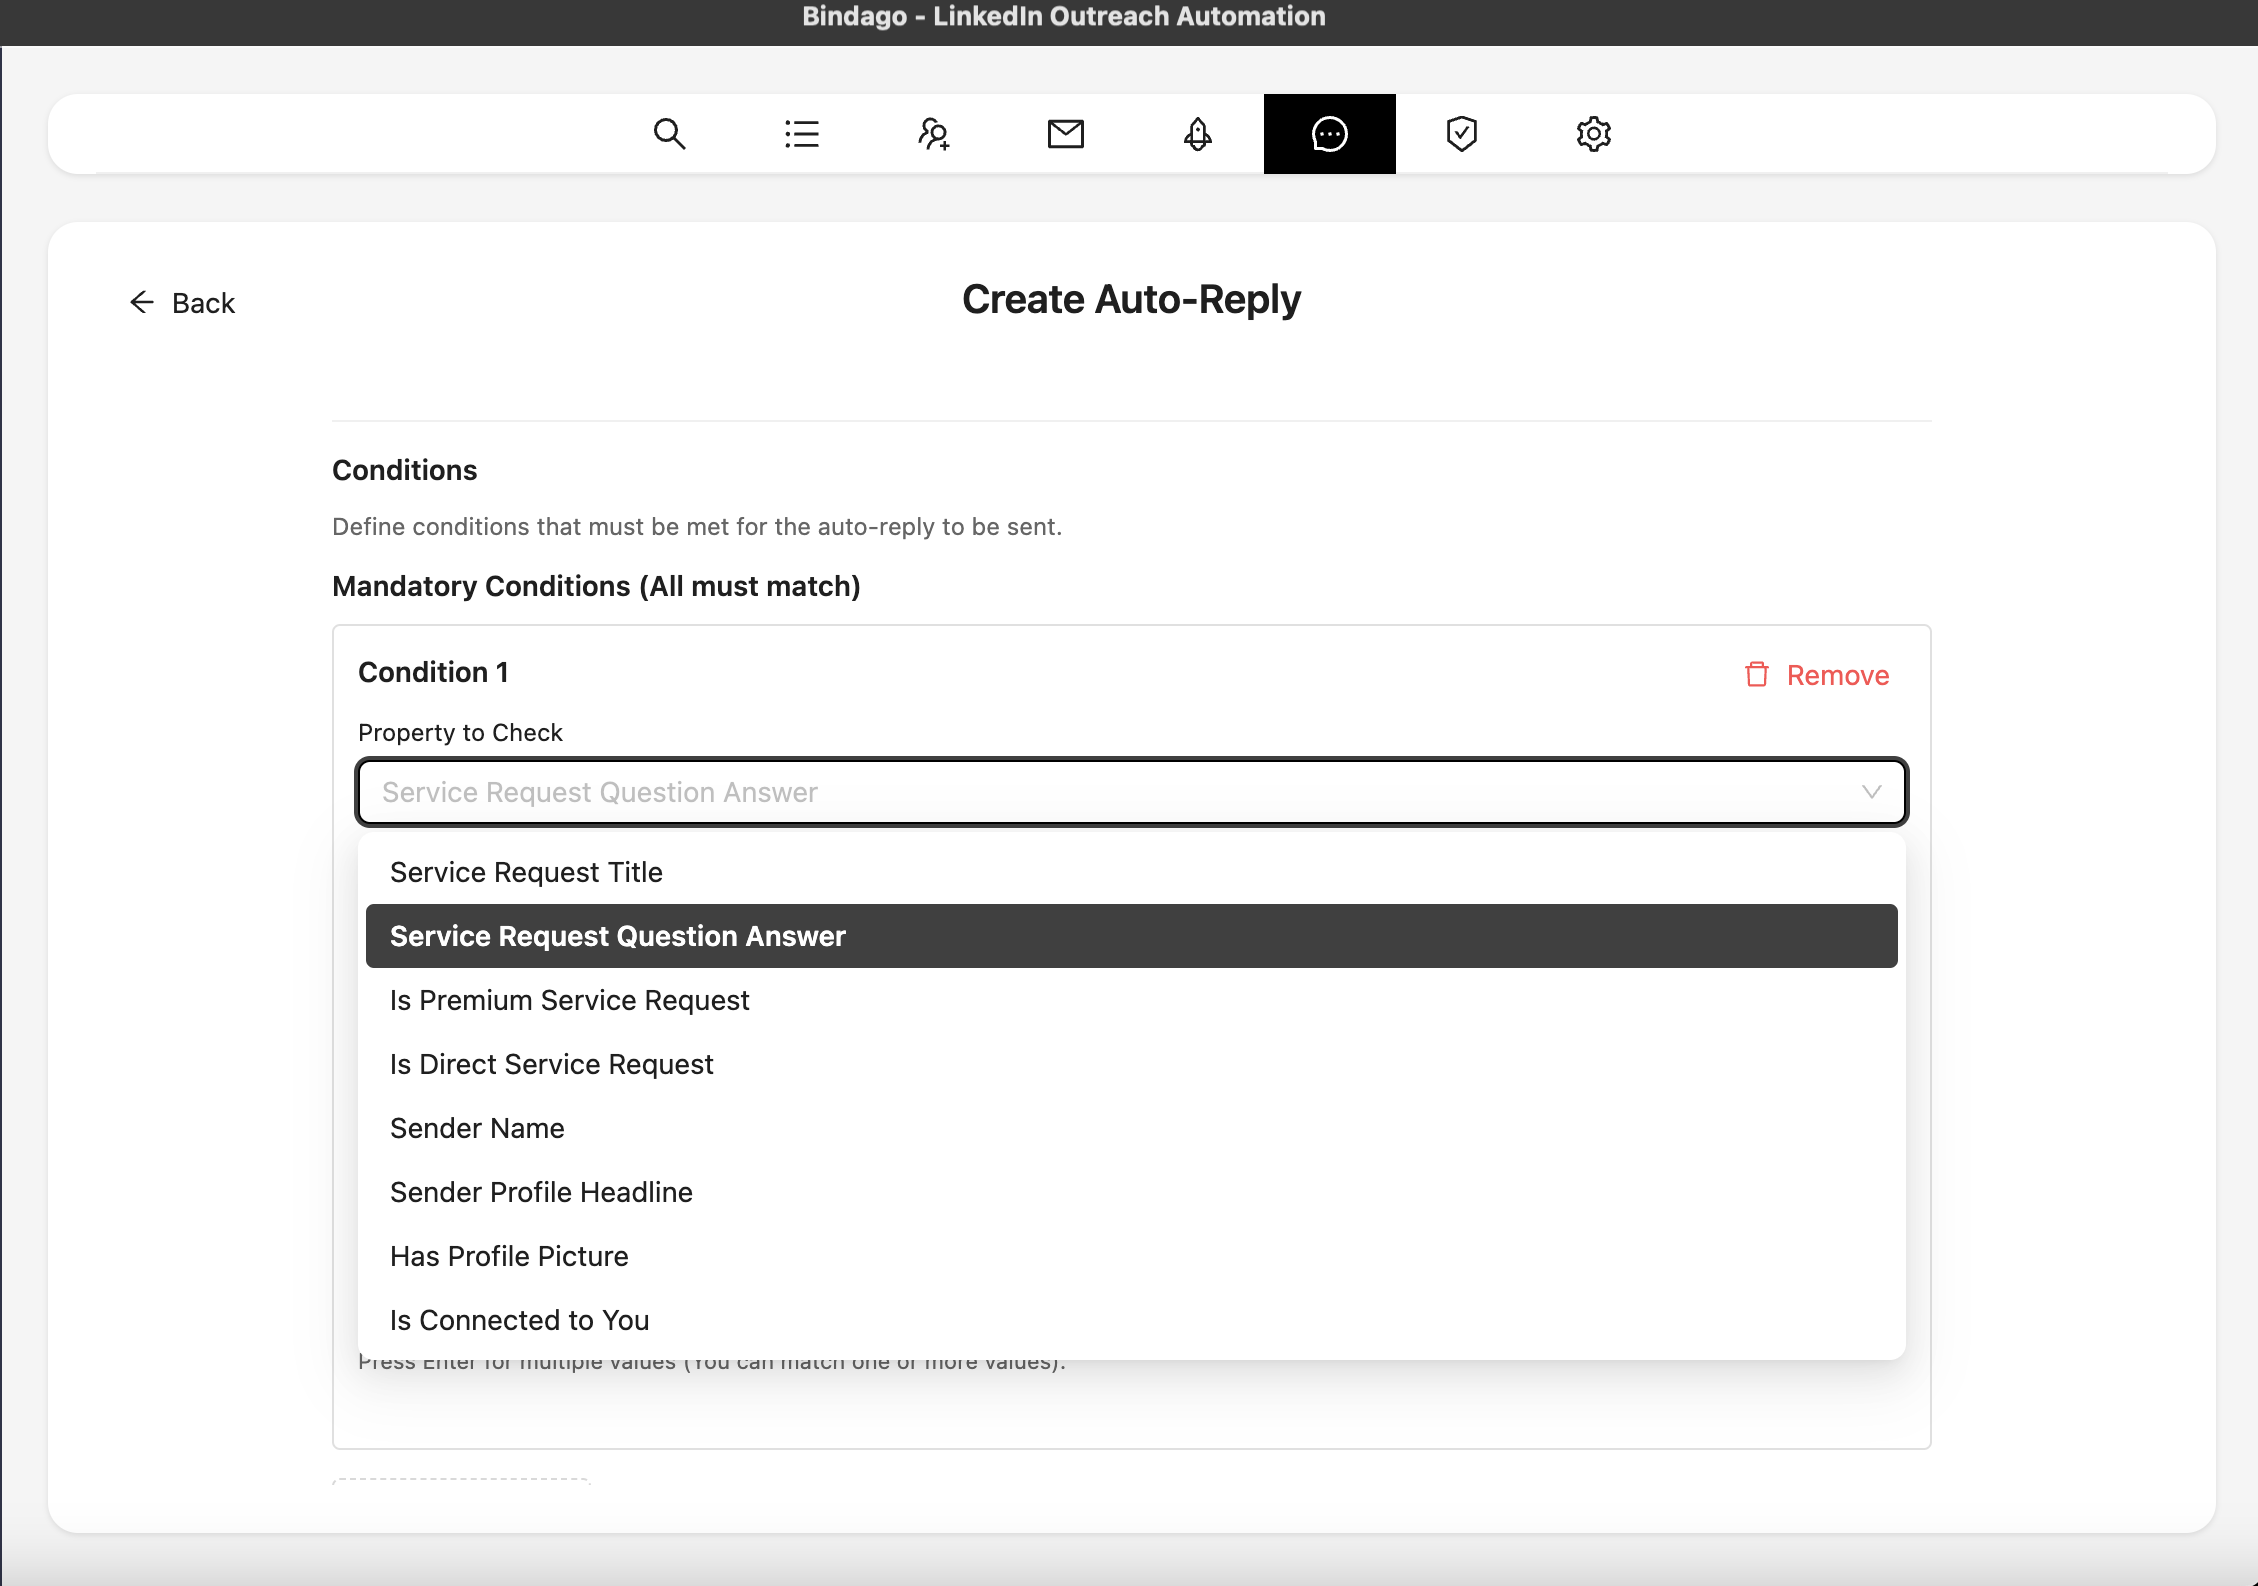
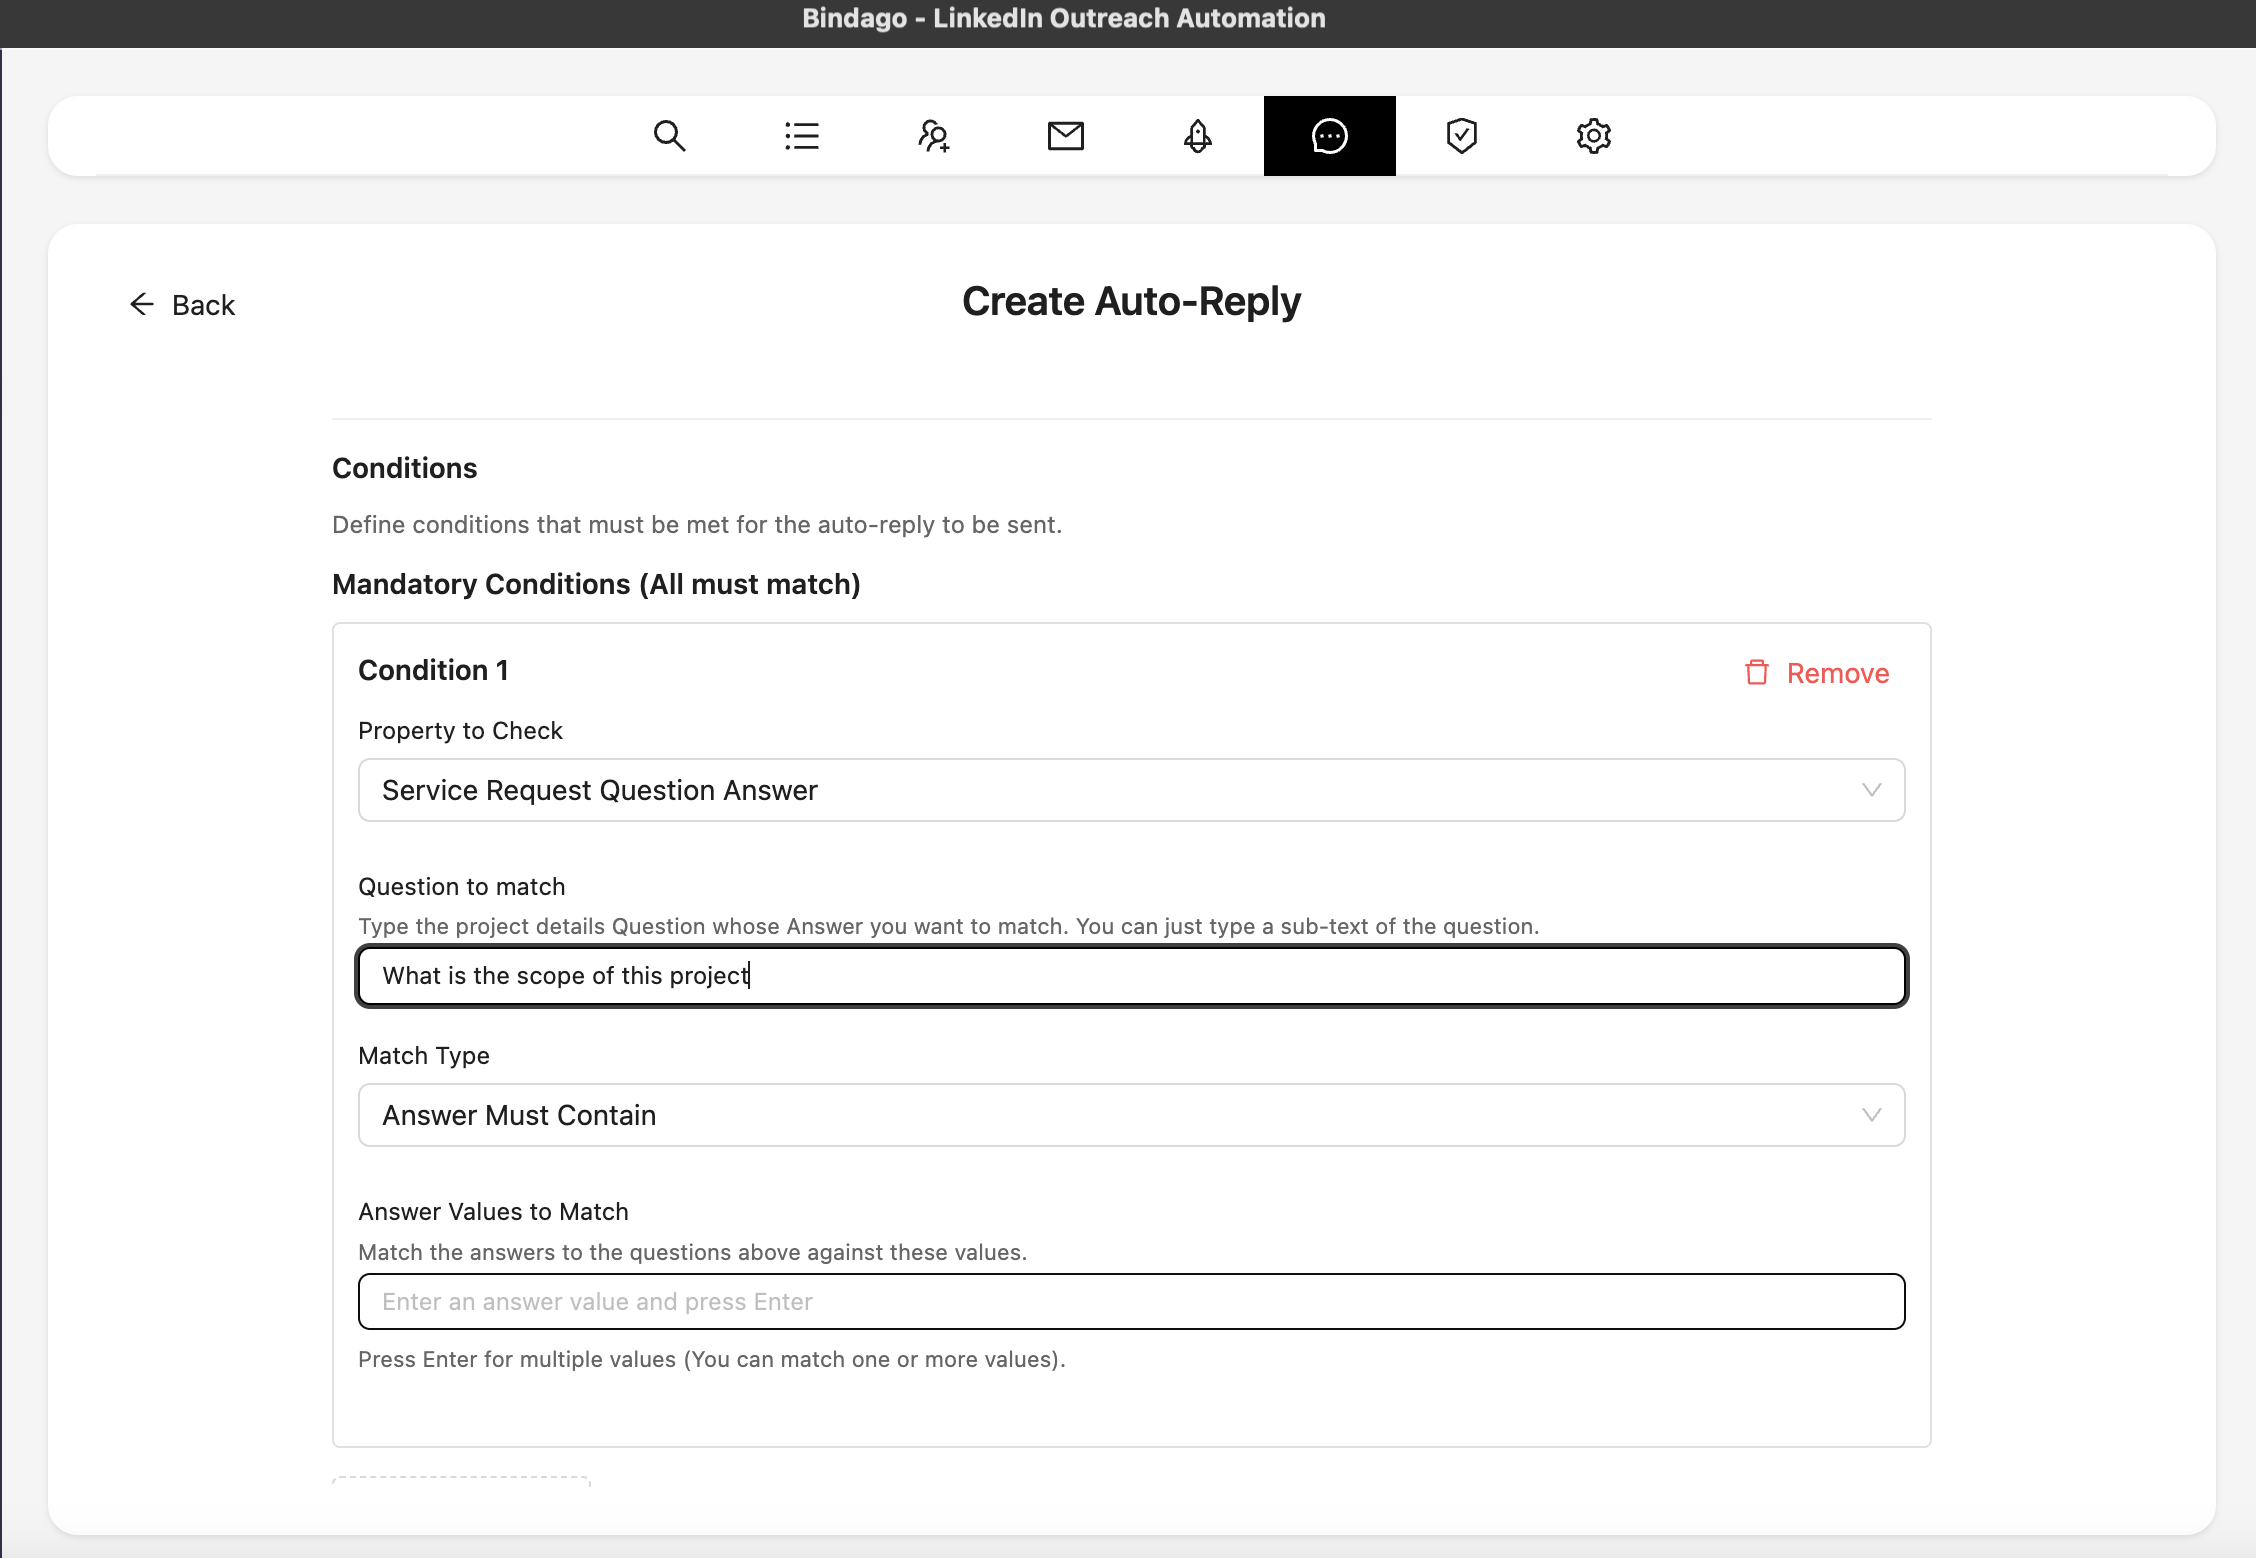
Configure Question Matching (Advanced)
If you want to match service requests based on answers to specific questions:
- Select "Service Request Question Answer" as the field.
- Enter the questions you want to look for in the "Questions to Look For" field (comma-separated).
- Select a match type (e.g., "Answer Must Contain", "Answer Must Start With").
- Enter the values you want to match against in the values field.
Write Your Proposal
- In the "Service Request Proposal" field, enter your proposal text.
- This is the proposal that will be automatically submitted when a matching service request is found.
- You can use variables like
{{firstName}},{{lastName}},{{company}}, and{{title}}to personalize your proposal. Bindago will automatically replace these with the requester's actual information. - Use the "Insert Variables" button and template dropdown to easily add variables and use saved message templates.
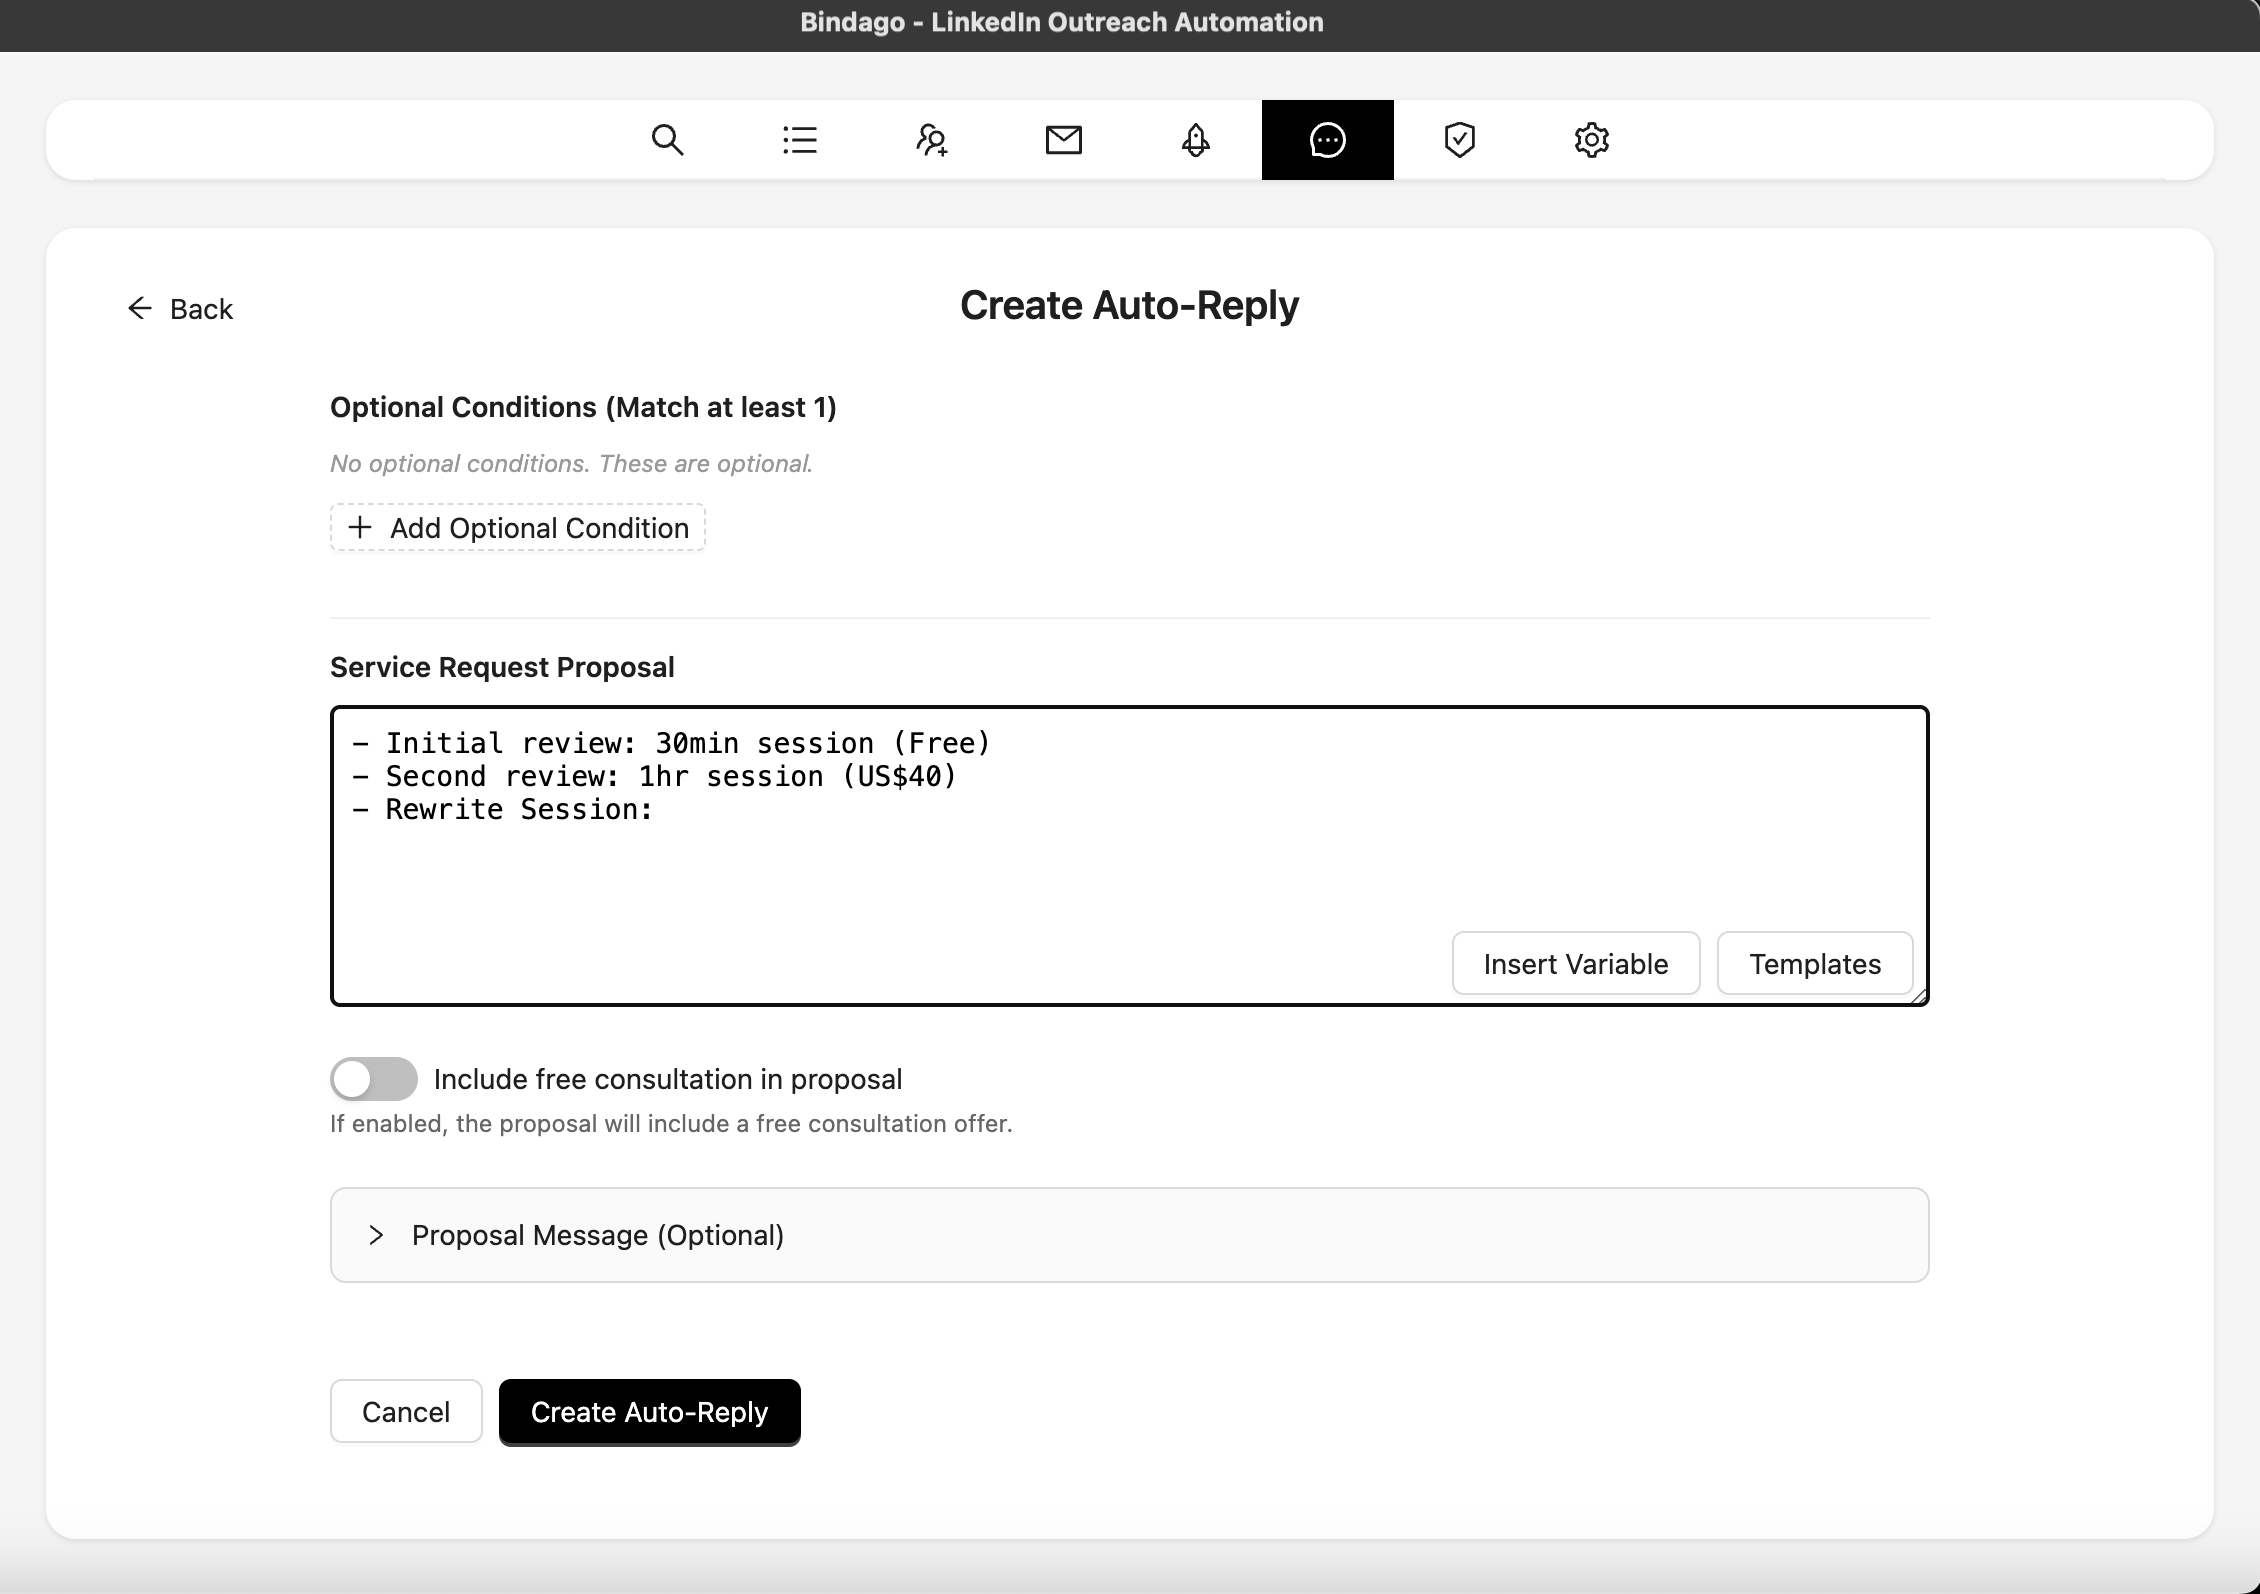
Configure Additional Options
- Proposal Message (Optional): You can customize the message that's sent along with your proposal. This message will be sent as a LinkedIn message to the service requester.
- Include Free Consultation: Toggle this option if you want to include a free consultation offer in your proposal.
Save and Enable Your Auto-Reply
- Once you've configured all your settings, click the "Create Auto-Reply" button to save your configuration.
- After creation, you can toggle the switch next to your auto-reply to enable or disable it.
- When enabled, Bindago will automatically monitor for new service requests and submit proposals based on your configured conditions.
Conclusion
Automating your responses to LinkedIn service requests can significantly improve your efficiency and help you capture more opportunities. With Bindago's auto-reply feature, you can set up intelligent, condition-based responses that ensure you're only submitting proposals to relevant service requests while maintaining a professional, personalized approach.
By configuring your auto-replies with appropriate conditions and well-crafted proposals, you can save valuable time while ensuring you never miss an opportunity that matches your expertise. Start by setting up a simple auto-reply configuration and refine it based on your results to maximize your success rate on LinkedIn's Service Marketplace.