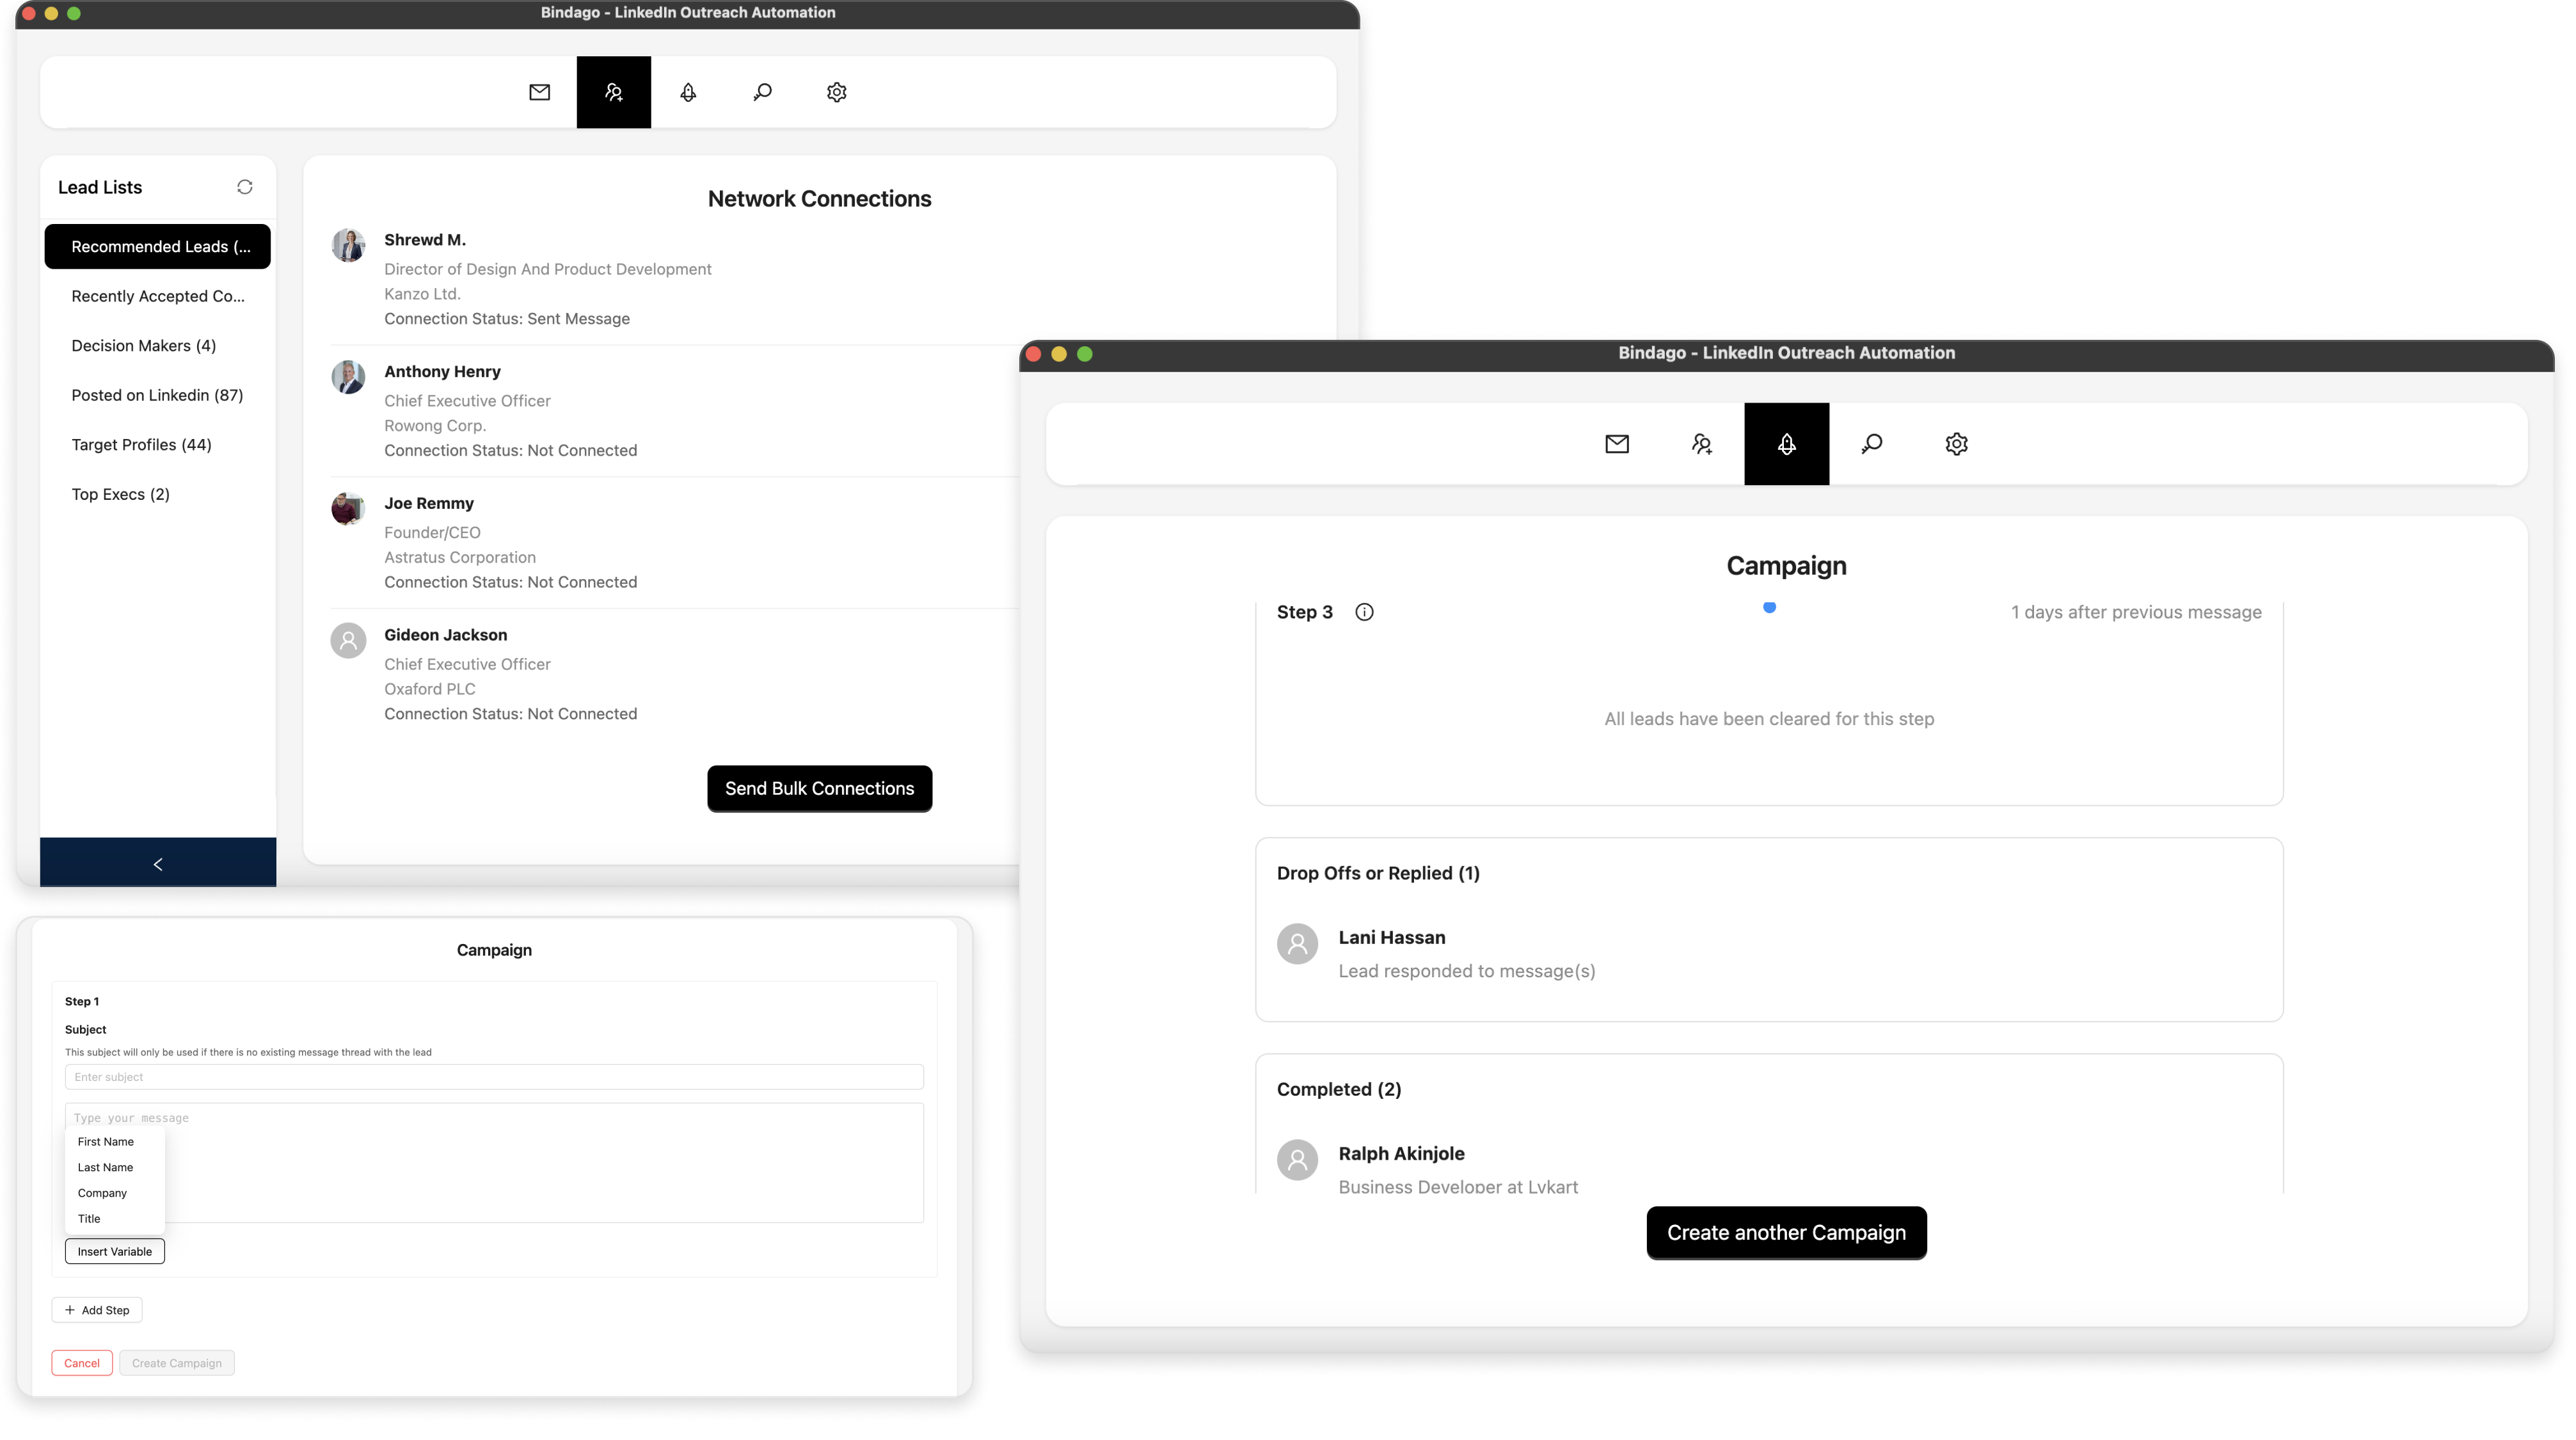
AI for LinkedIn Outreach: How to Personalize Messages at Scale
Personalised outreach gets replies. Generic outreach gets ignored.
The problem is that personalising every connection note and follow-up message by hand does not scale. You end up choosing between volume and quality.
Bindago's AI Message Personalisation removes that trade-off. You write your base message once, and the AI rewrites a short personalised section for each lead using their actual LinkedIn profile - headline, recent posts, current role, skills, and more.
This guide walks through the entire process from start to finish, assuming you are new to Bindago.
Step 1: Install and log in
Download and install Bindago. It is available for Windows, macOS, and Linux. You get a 10-day free trial with no credit card required.
Once installed, open the app and log in with your LinkedIn account.
Step 2: Navigate to Campaigns
From the top menu, click Campaigns to open the campaigns section. This is where you create, manage, and monitor your outreach sequences.

Step 3: Create a campaign and write your base message
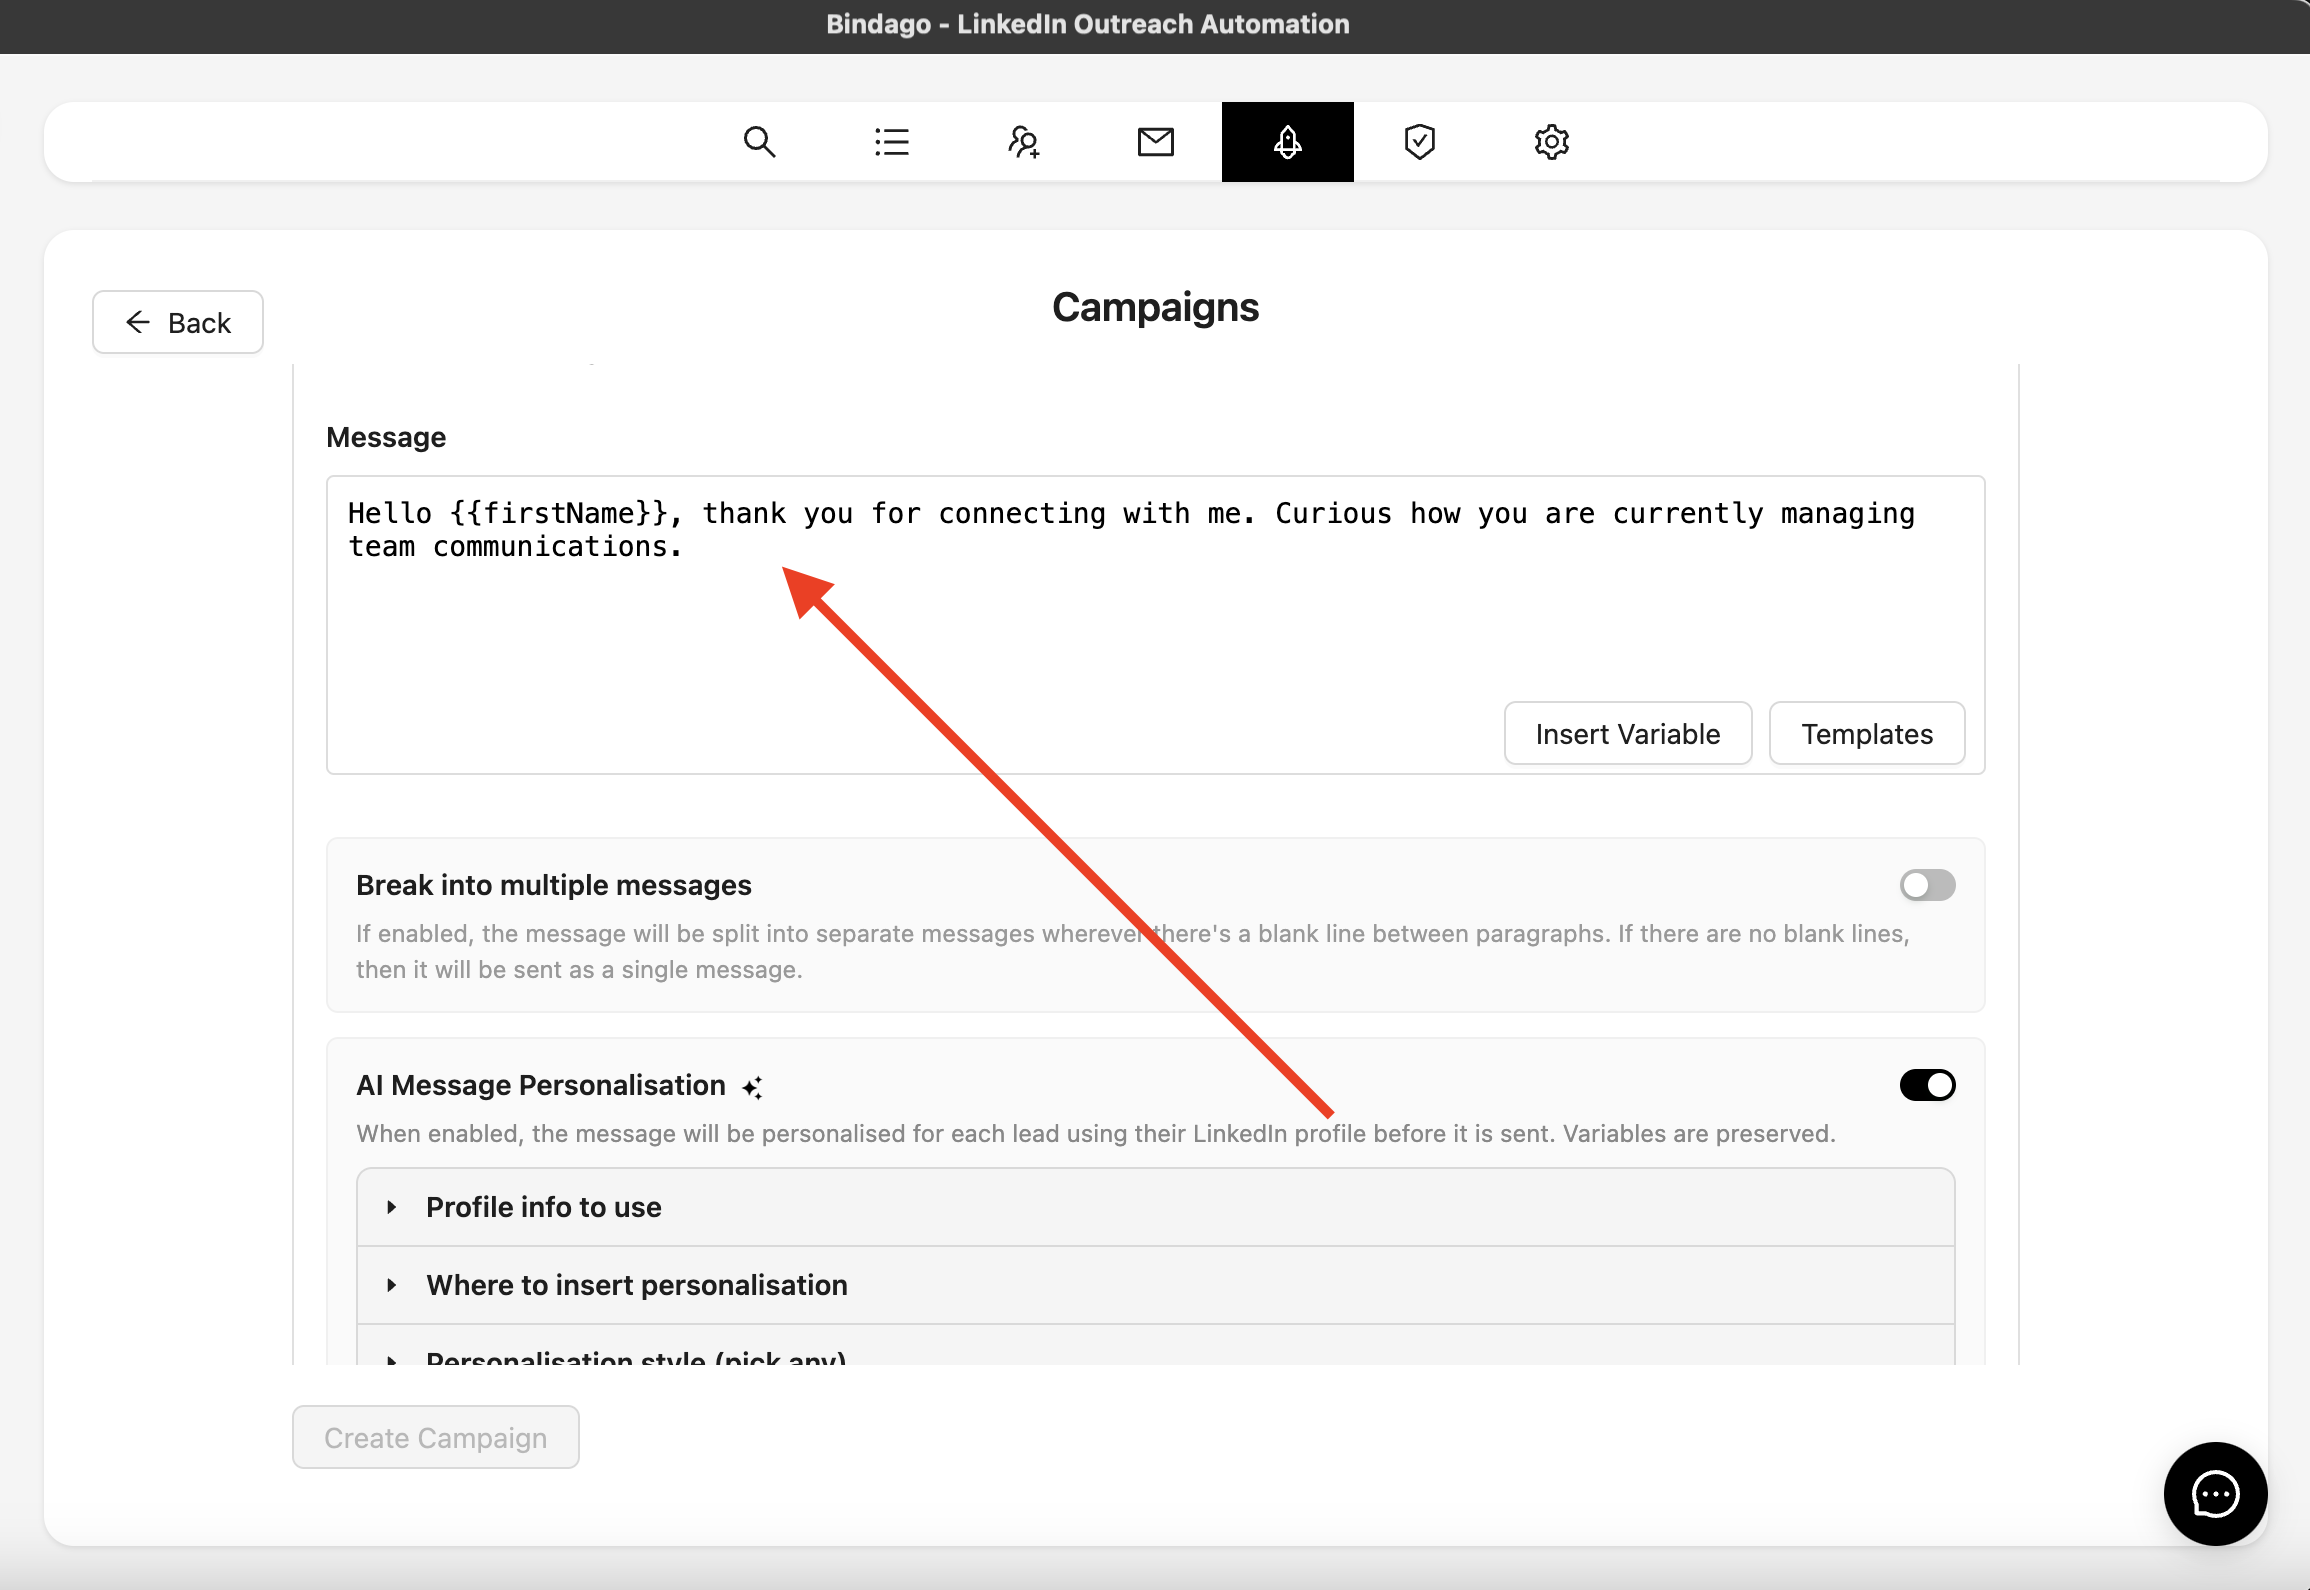
Click the button to create a new campaign. Choose a lead source (LinkedIn search URL, Sales Navigator search or lead list, or a CSV file), add your steps, and write your base message using merge variables like {{firstName}} and {{company}}. This is the message every lead would receive without AI personalisation.
Step 4: Enable AI personalisation
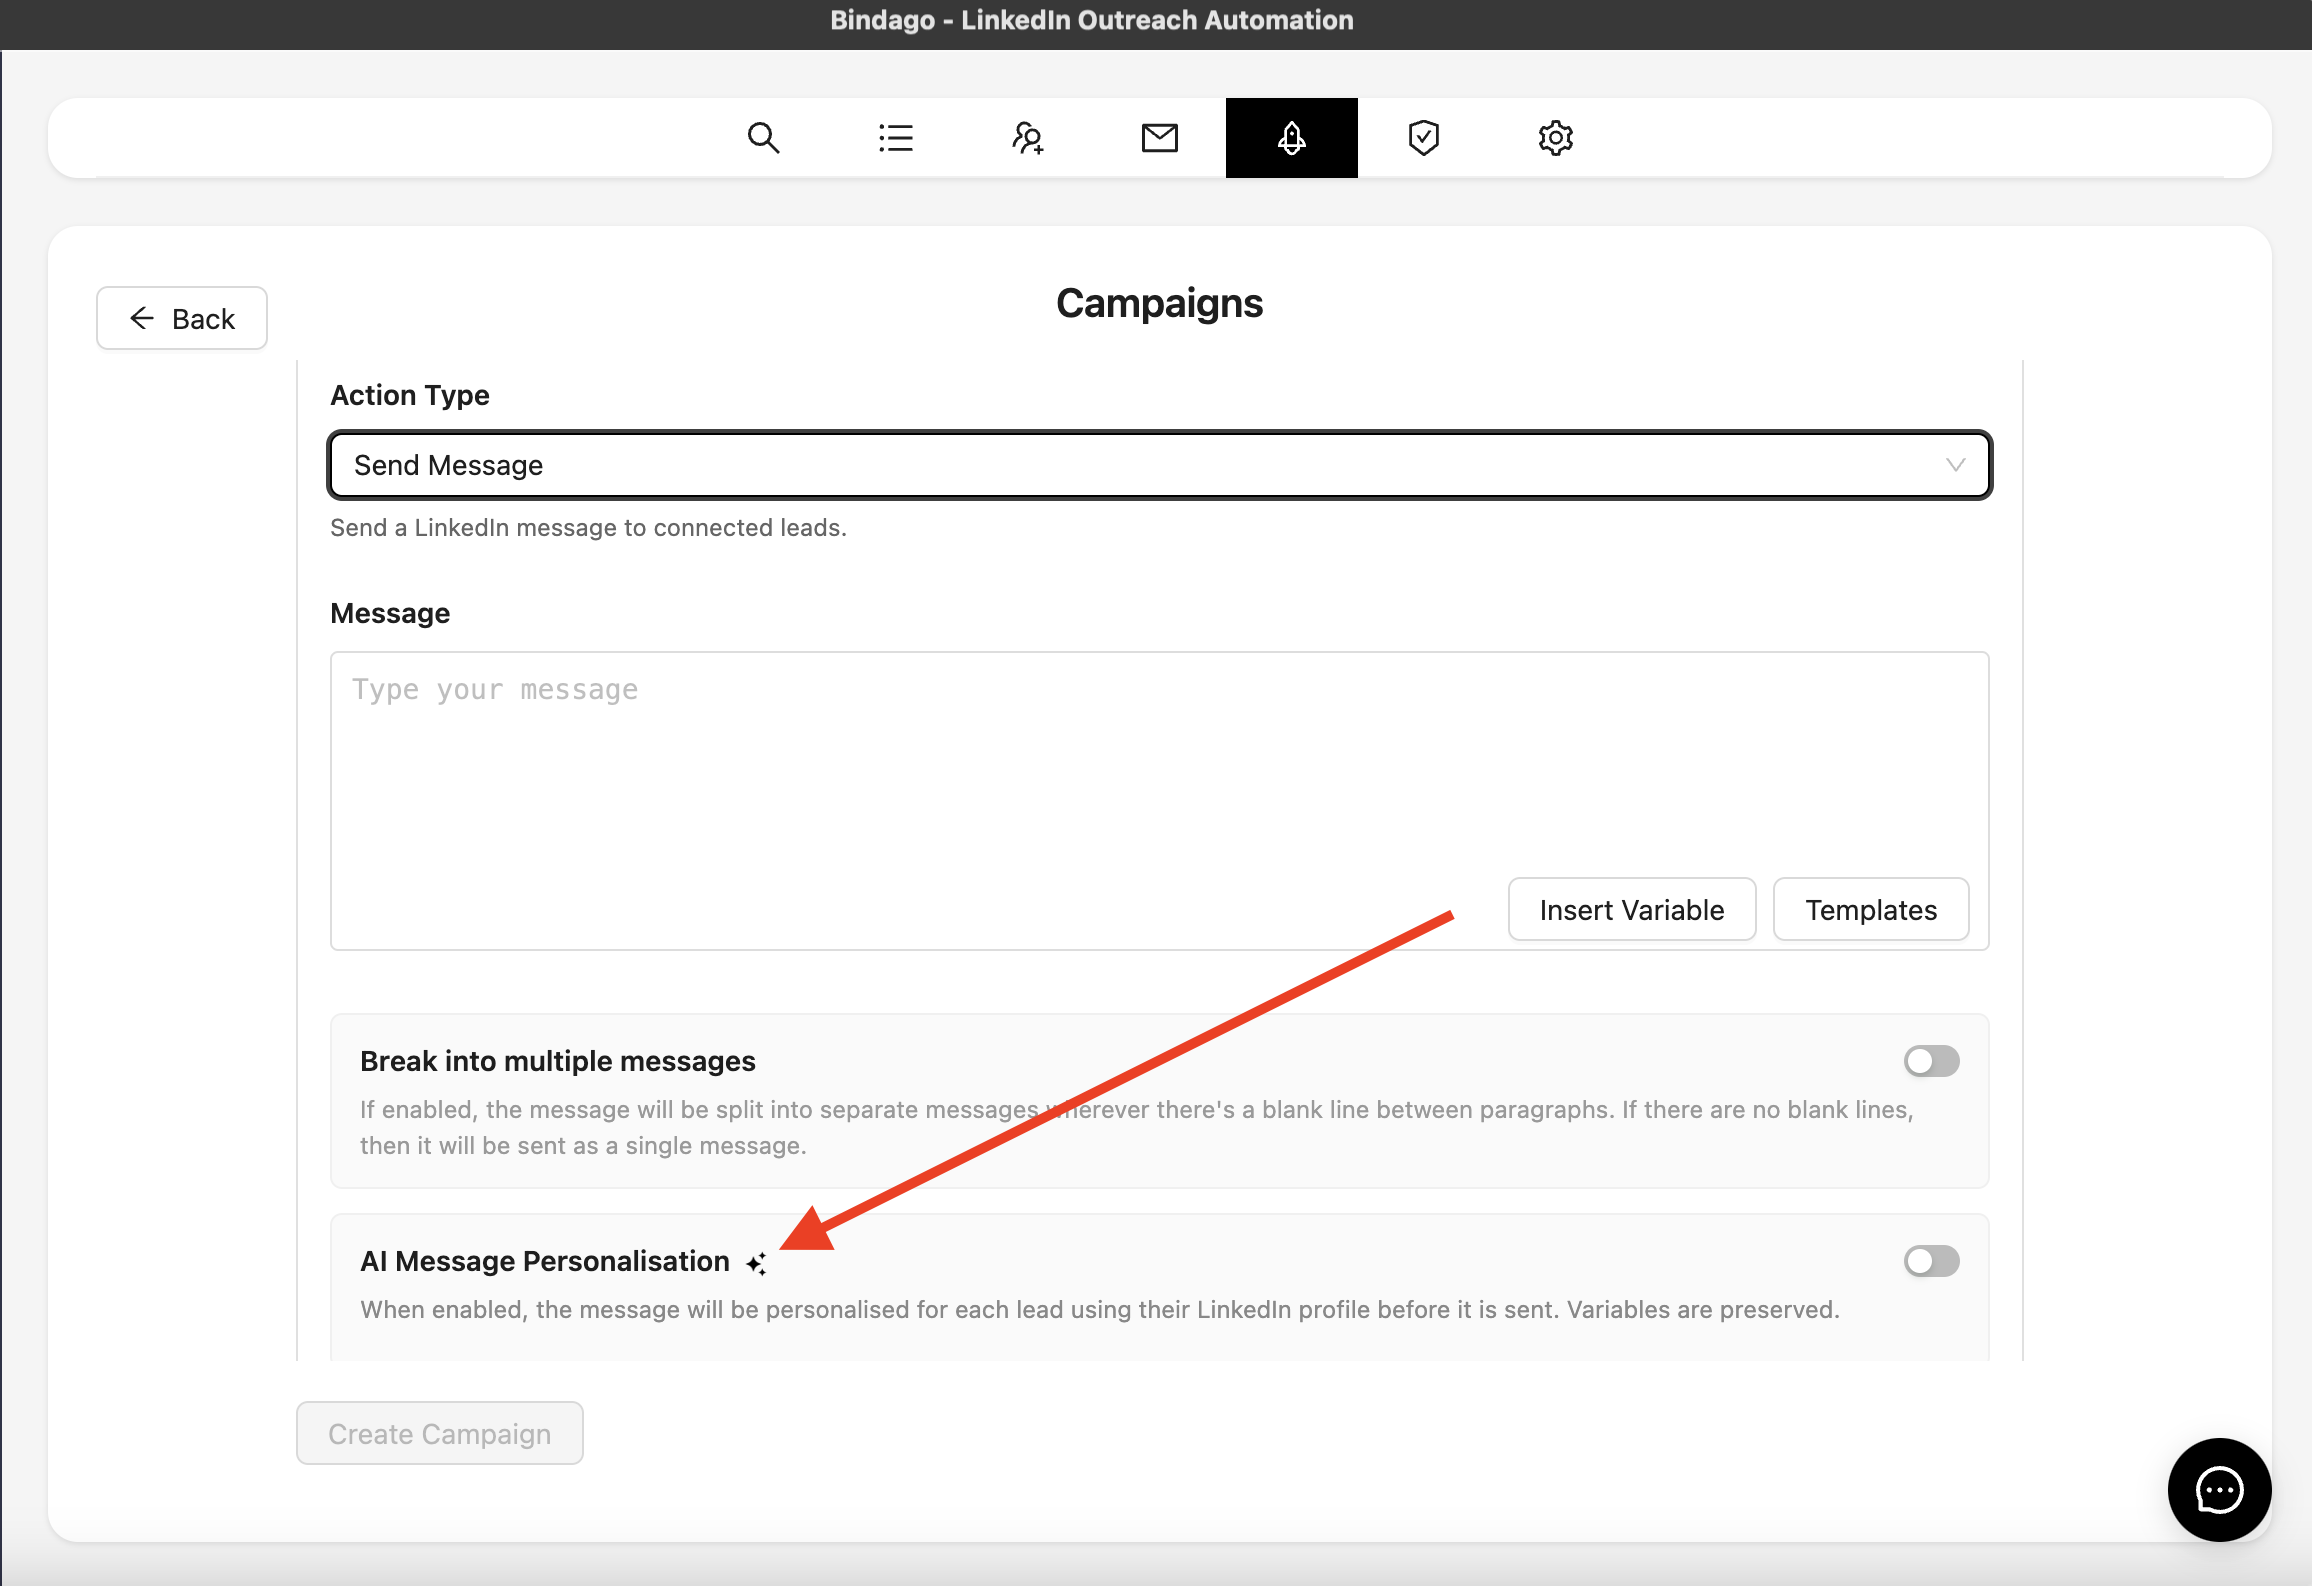
On the campaign step, enable the AI personalisation toggle. This tells Bindago to rewrite part of your message for each lead using their LinkedIn profile.
Step 5: Choose which profile fields the AI uses
You control which parts of a lead's LinkedIn profile the AI draws from:
- Headline - their one-line positioning
- Summary / About - goals, background, and positioning in their own words
- Current role & company - what they do now
- Past positions - career history for shared-experience hooks
- Education - schools, degrees, programmes
- Skills - listed competencies
- Recent posts - their latest activity on LinkedIn
- Shared companies / schools / groups - mutual background with you
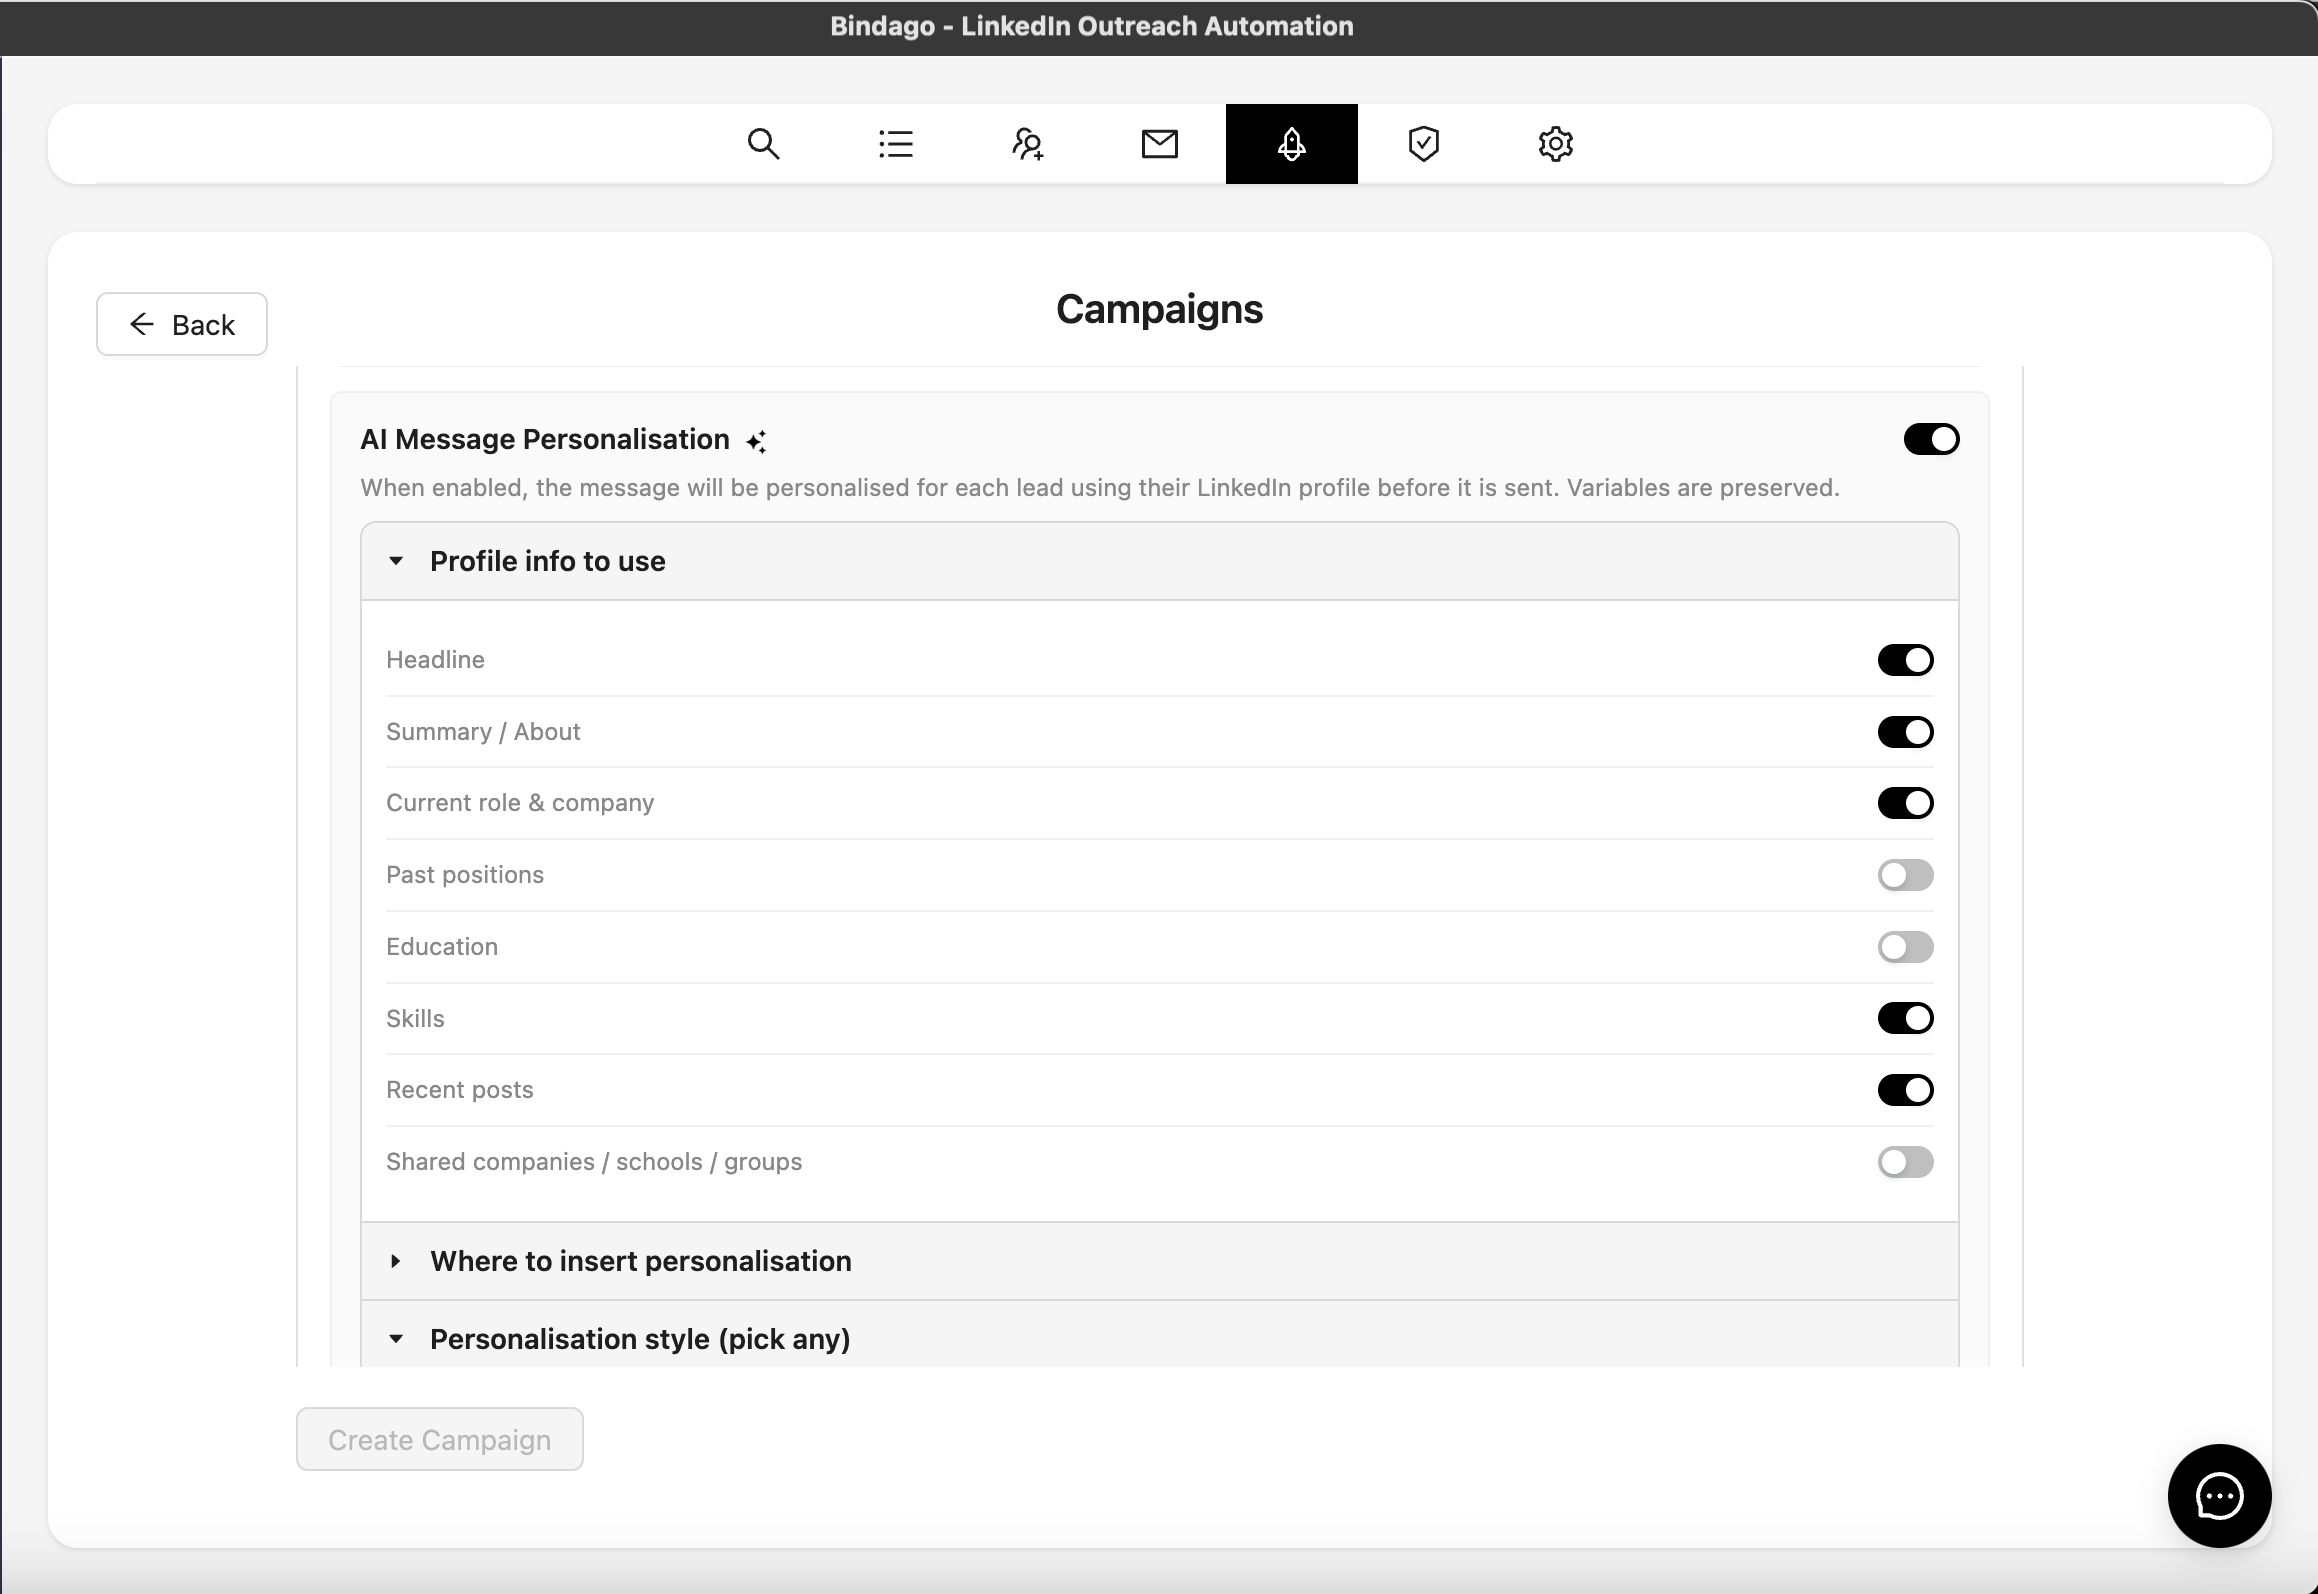
Toggle on the fields that matter for your campaign. If you are reaching out to founders, headline and current role may be sufficient. If you want to reference something they published, turn on recent posts.
Step 6: Set the insertion point
Choose where the personalised section appears in your message. You have three options:
- Start - places the personalised section at the beginning of your message
- Middle - inserts it between your opening and closing
- End - appends it after your main body
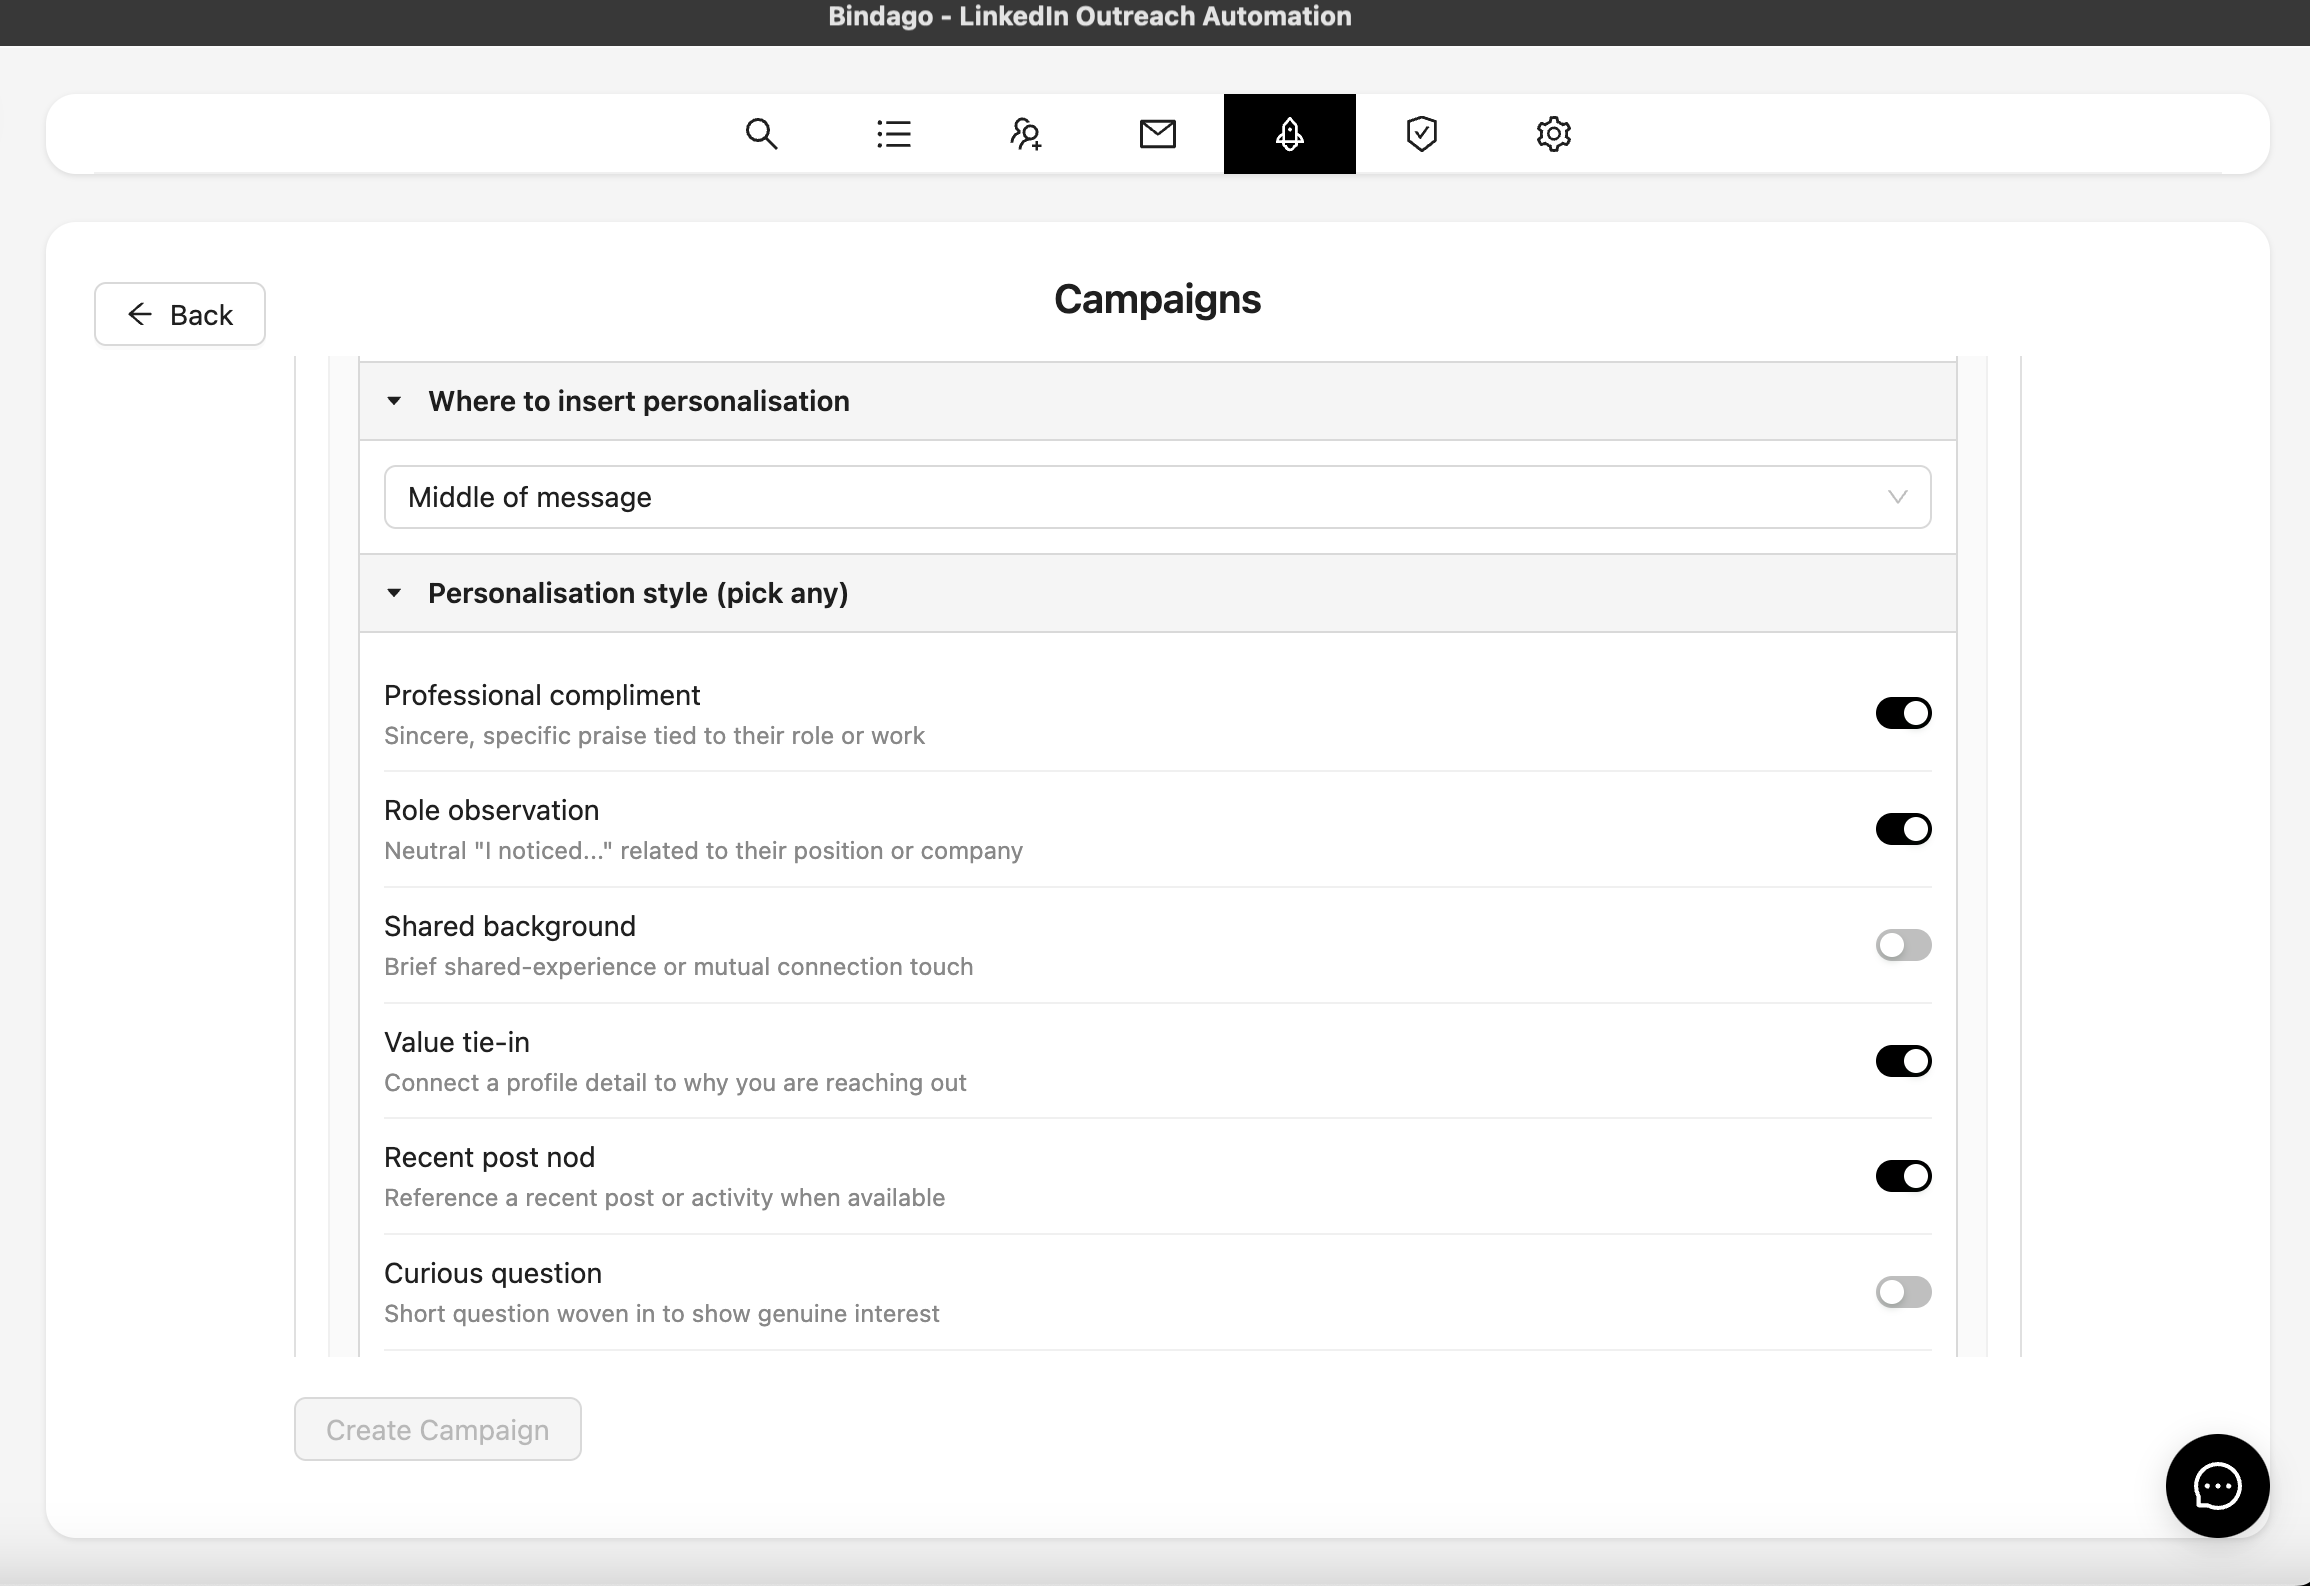
The rest of your message (including merge variables) stays intact.
Step 7: Pick a personalisation style
The style controls the tone and angle of the personalised section. You can enable multiple styles and the AI will pick the best fit for each lead's profile:
| Style | What it does |
|---|---|
| Professional compliment | Sincere, specific praise tied to their role or work |
| Role observation | Neutral "I noticed..." related to their position or company |
| Shared background | Brief shared-experience or mutual-connection touch |
| Value tie-in | Connect a profile detail to why you are reaching out |
| Recent post nod | Reference a recent post or activity when available |
| Curious question | Short question woven in to show genuine interest |
| Expertise respect | Respect for their craft or niche, matter-of-factly |
Step 8: Test before sending
Before the campaign runs, you can test the AI output on individual leads. Hit the test button to see exactly what the AI generates for a specific profile.
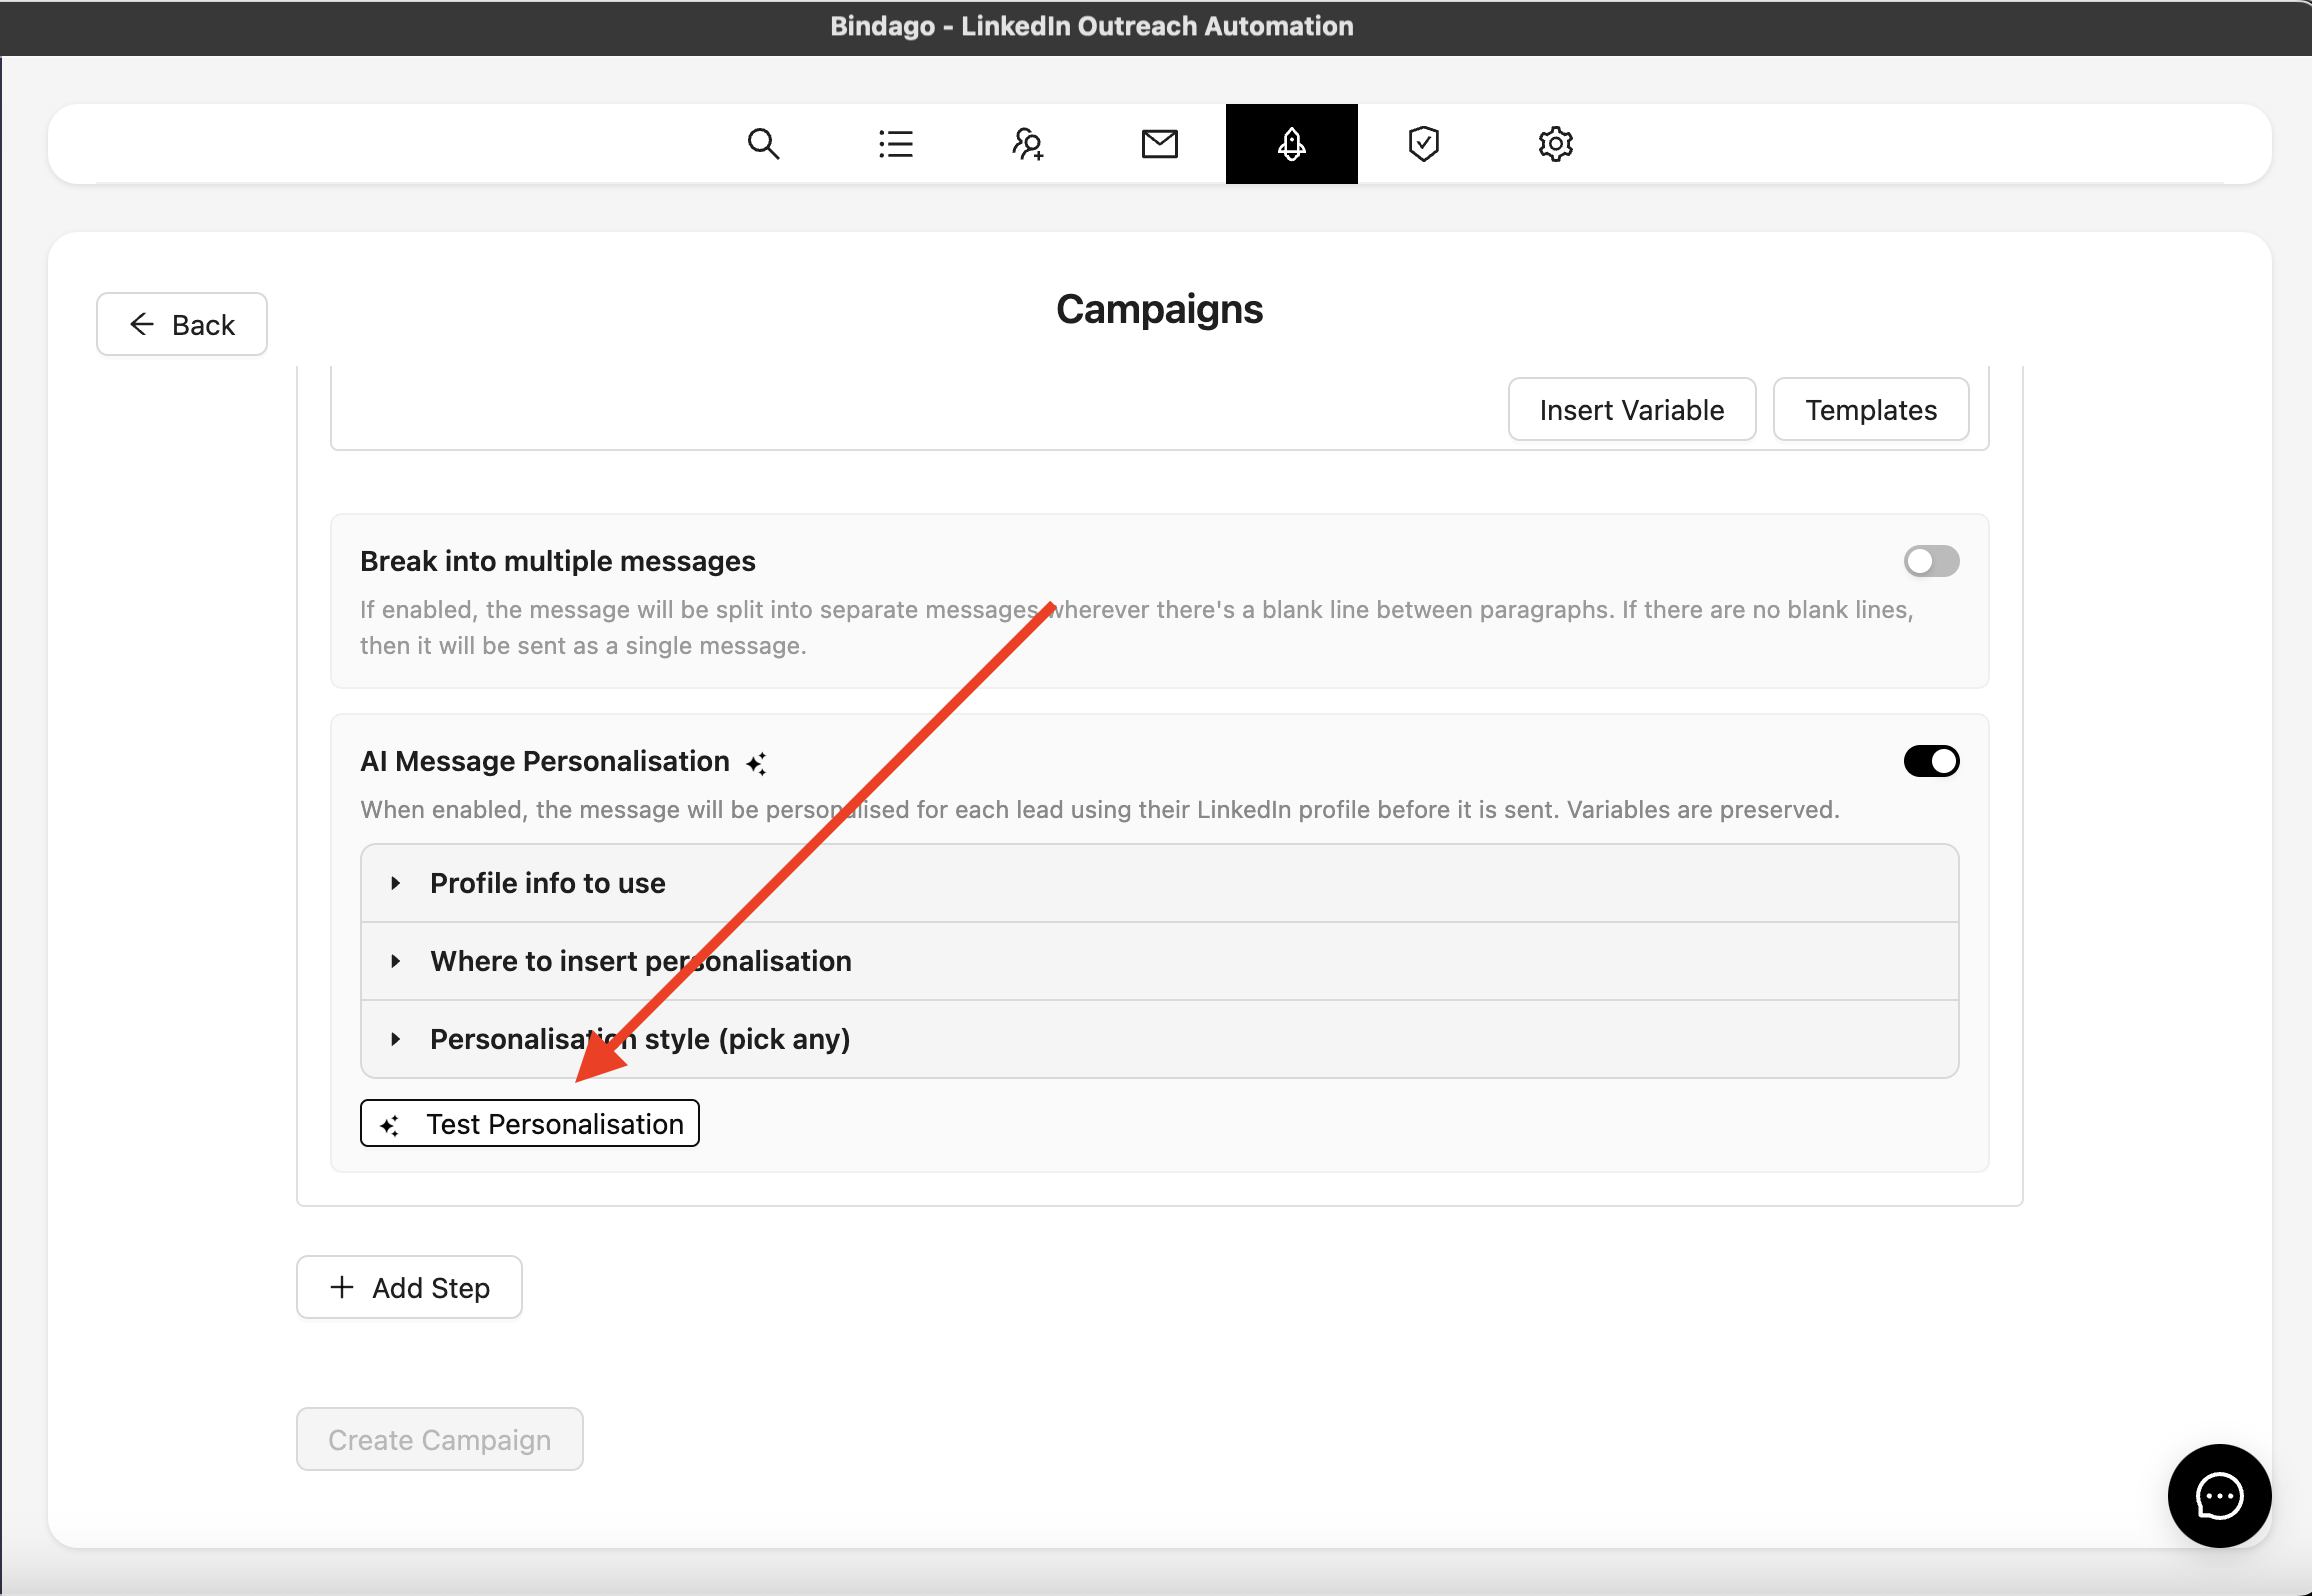
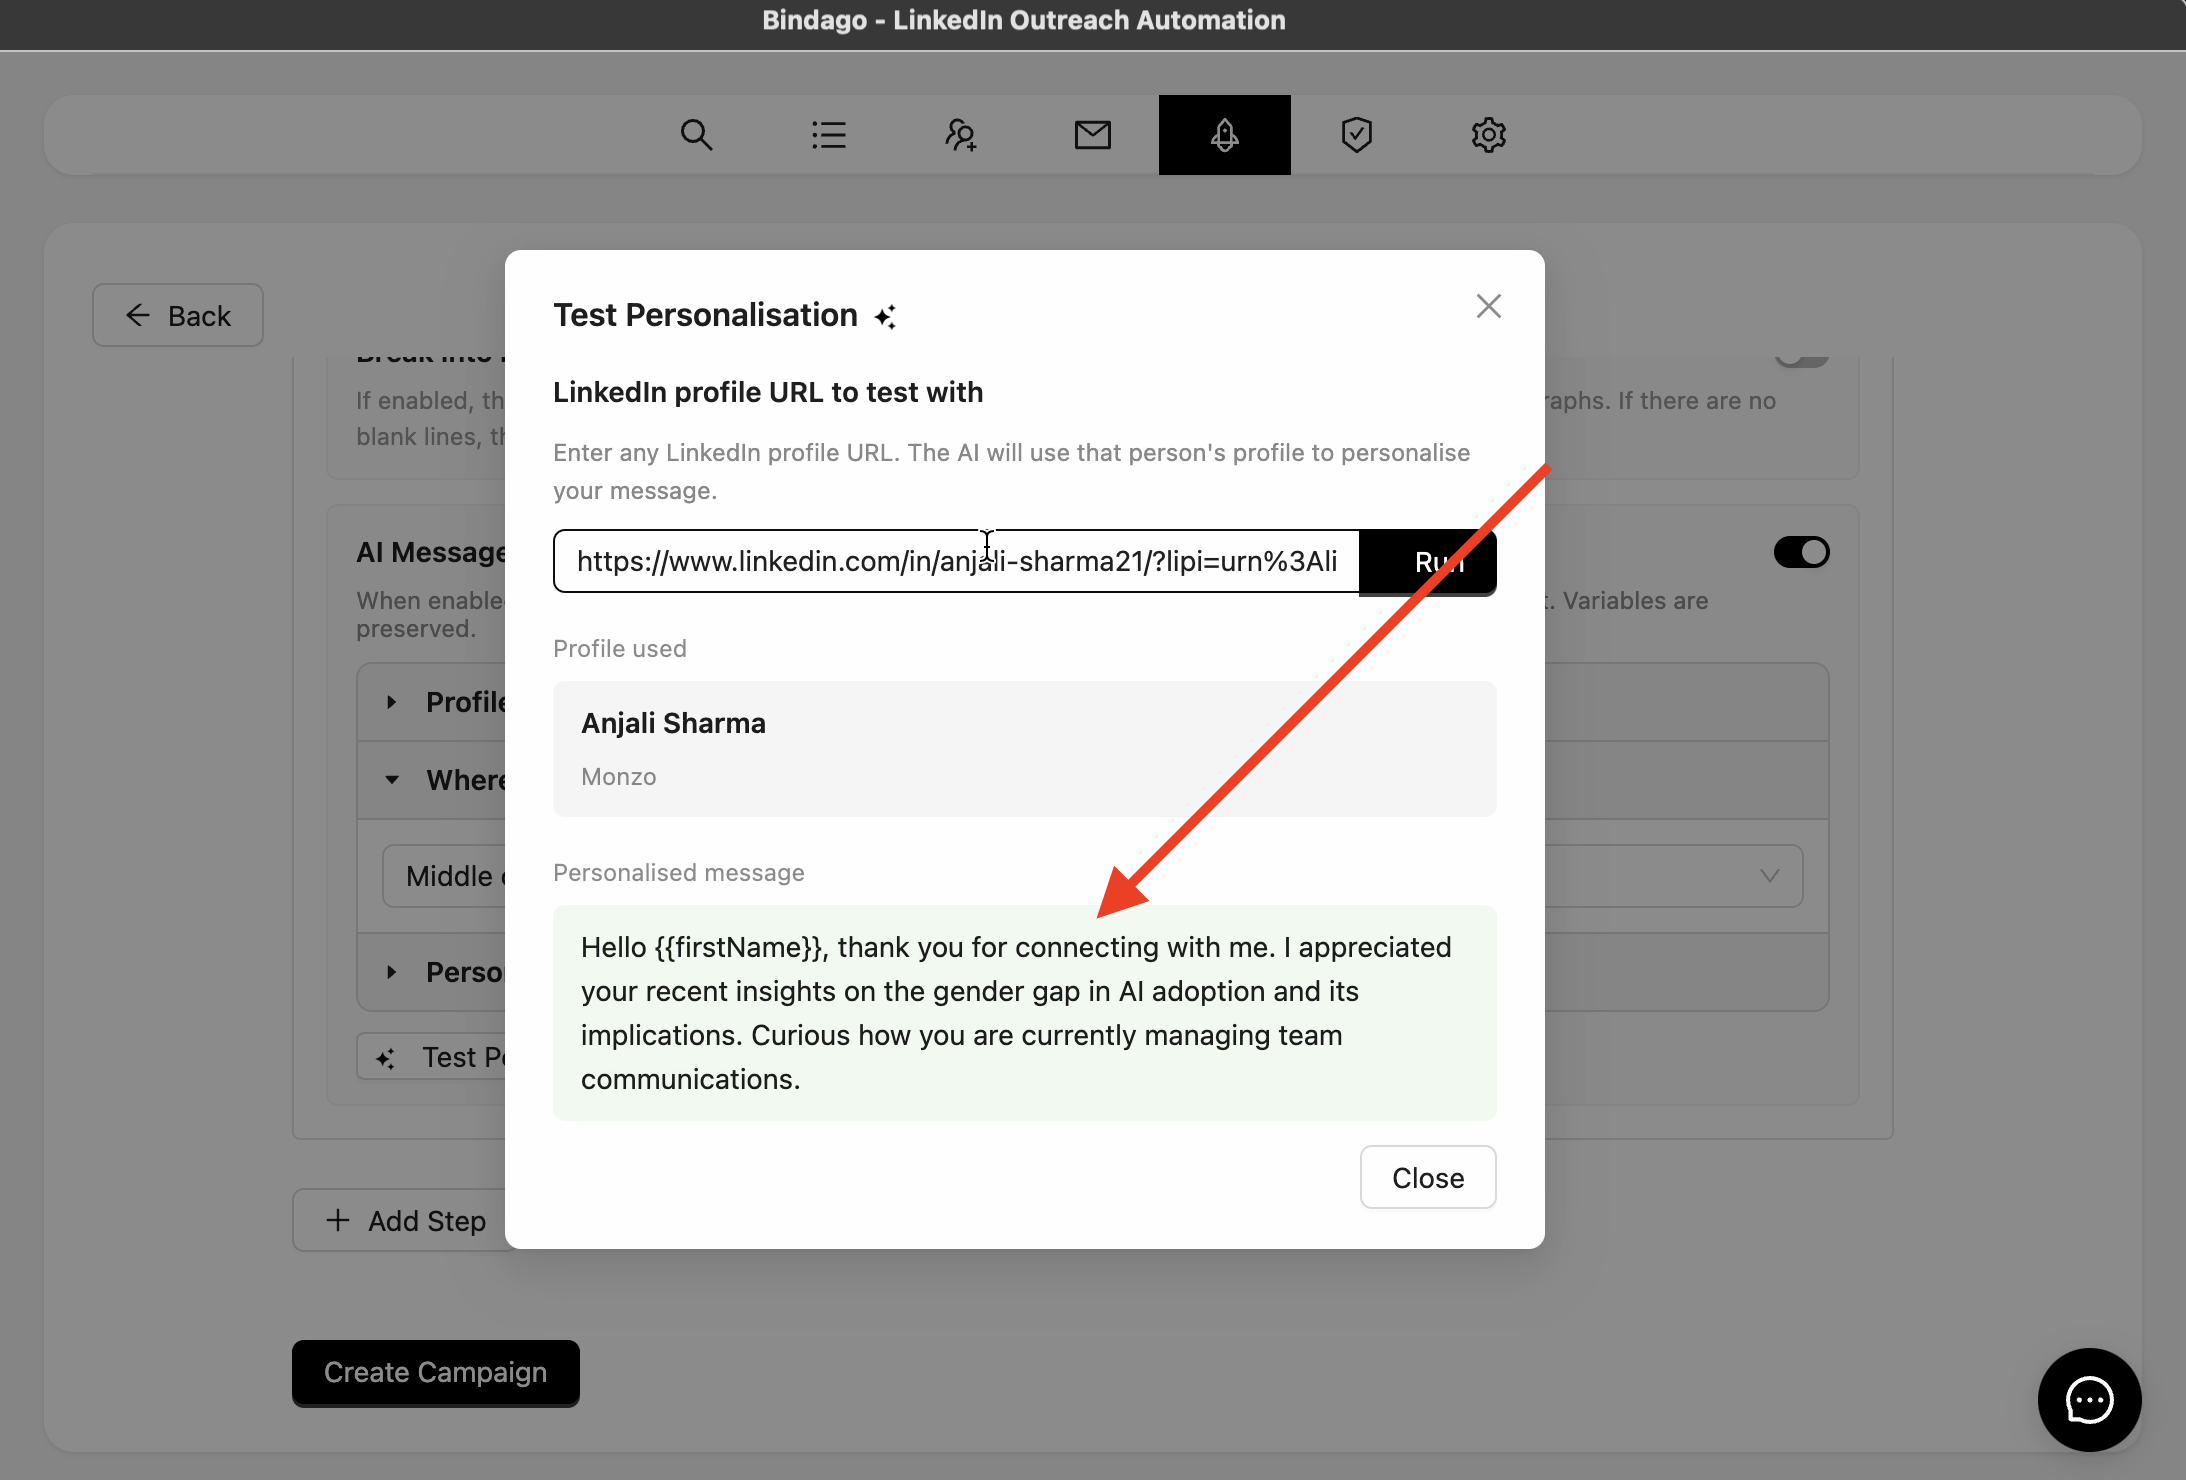
This lets you validate tone, length, and accuracy before any messages go out. If something feels off, adjust the profile fields or styles and test again.
If a lead's profile does not have enough information for the AI to personalise, the original message (with merge variables) is sent as-is. No lead gets skipped.
Step 9: Launch the campaign
Once you are happy with the test output, start the campaign. Bindago will send each lead a personalised version of your message as it processes the sequence.
Tips
-
Use fewer profile fields when you want focus. Enabling everything gives the AI more options but can produce generic results. If your leads are all CTOs, just turn on headline and current role for tighter, more relevant personalisation.
-
Test on a few leads before launching. Different lead profiles produce different outputs. Test on a handful to make sure the tone is consistent.
-
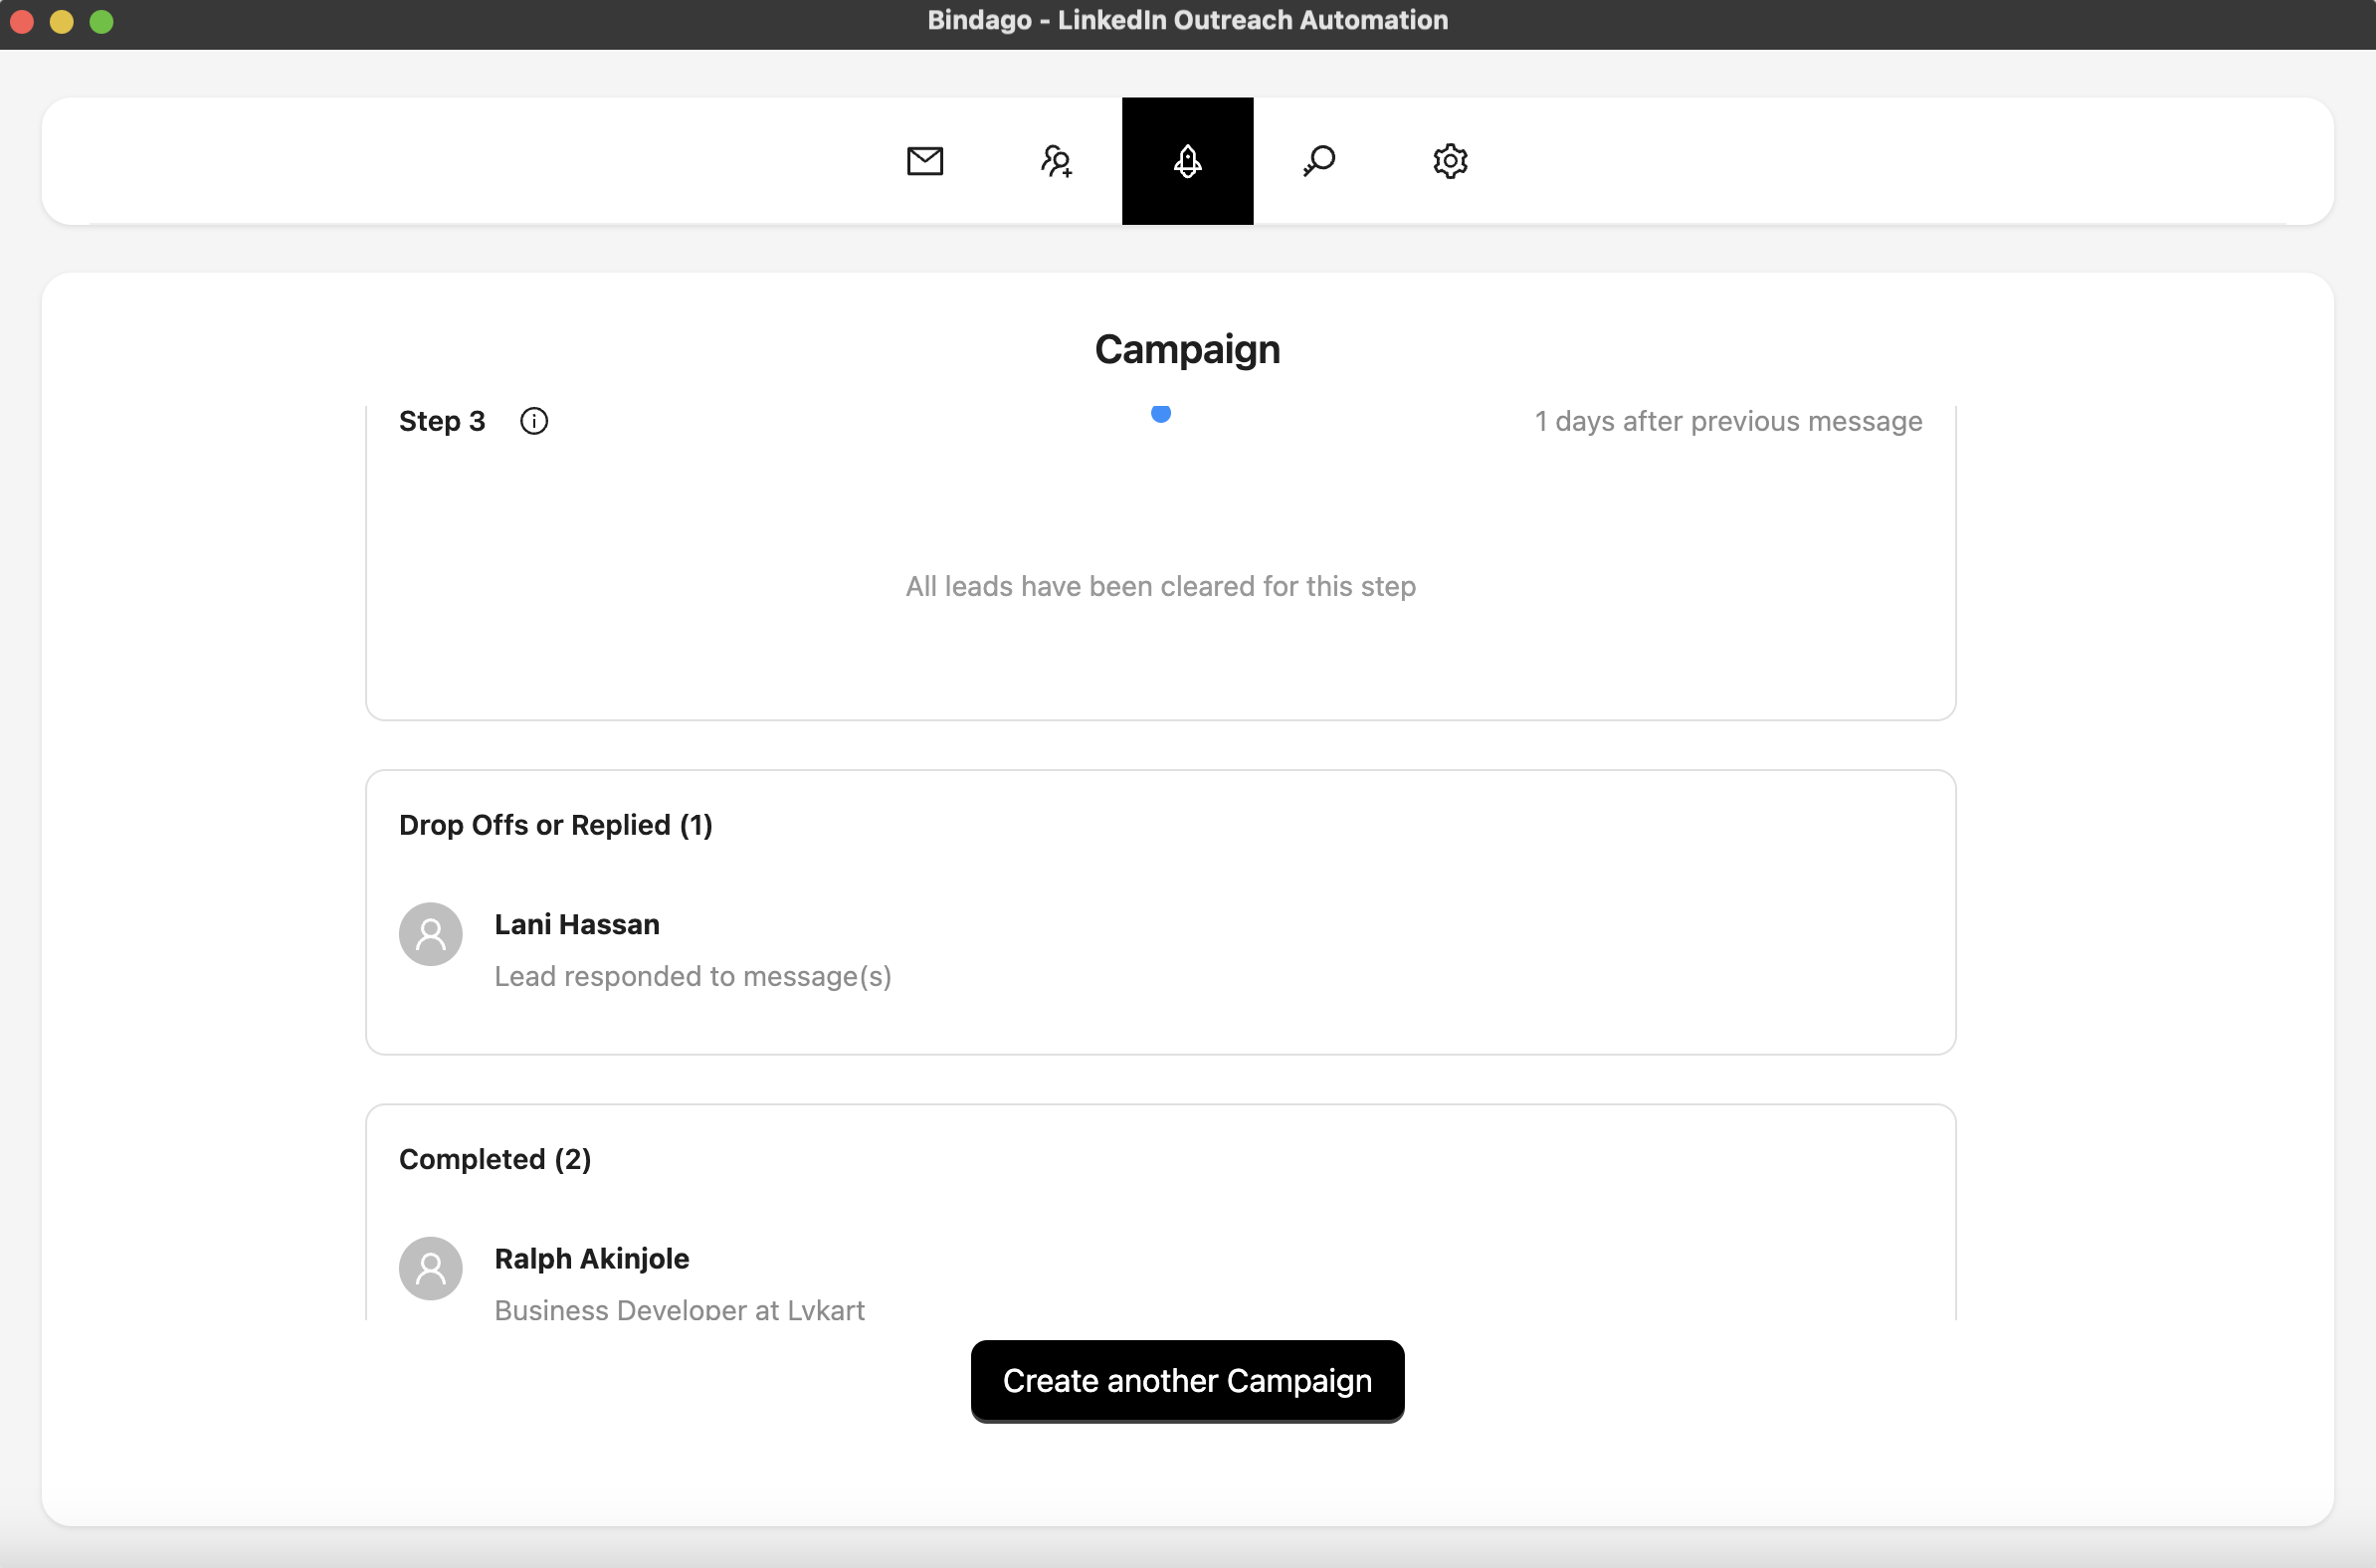
Pair with Intelligent Campaigns. Once replies start coming in, Bindago's Intelligent Campaigns feature reads responses and drops leads from the sequence when they are no longer interested - so your AI-personalised messages only go to people who are still in play.
When to use AI personalisation vs. plain templates
| Scenario | Recommendation |
|---|---|
| High-value prospects, small list | AI personalisation on |
| Event follow-ups where you share context | Plain template with merge variables |
| Large-scale connection requests to build pipeline | AI personalisation on |
| Re-engaging old connections | AI personalisation on (reference recent activity) |
| Internal or team-to-team messages | Plain template |
You write the message once. The AI makes it feel like you wrote it for each person.
Try Bindago free for 10 days (no credit card required).